|
|
Post by 1320wayne on Aug 26, 2008 20:07:44 GMT -6
O.K., here it is. This is going to be a bit lengthy but hopefully it will help some make the neccessary adjustments to their builds. These first couple of pics. show the before and after with the adjustments needed to make these kits resemble what was run back in the early to mid 70's. 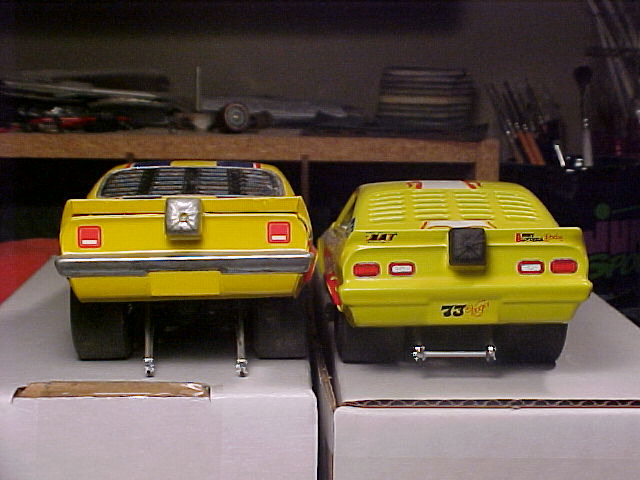 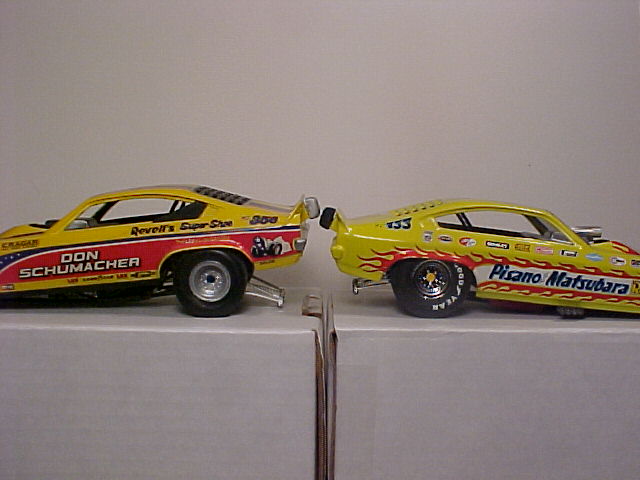 Start by assembling the chassis as per the instructions.  Next cut the rear end attachment tabs where you see marked. Cut them cleanly with little material lost because they are going back on. 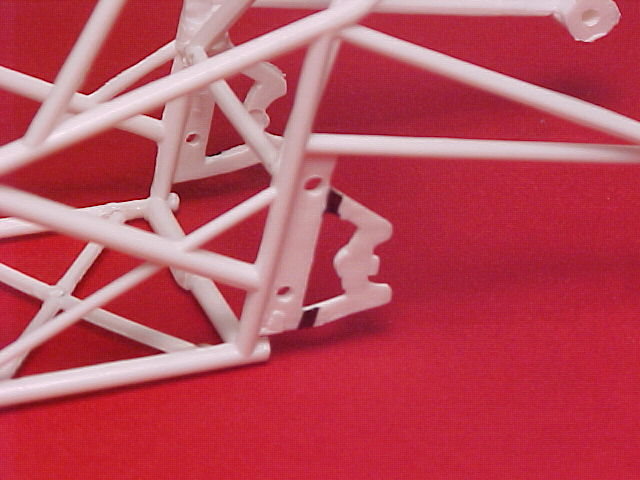 Here you see the attachment back in place, moved up as high as it will fit. You may have to attach the rear end itself for extra bracing. This shouldn't be an issue because I don't recall seeing too many reference pics. of chrome rear ends before. 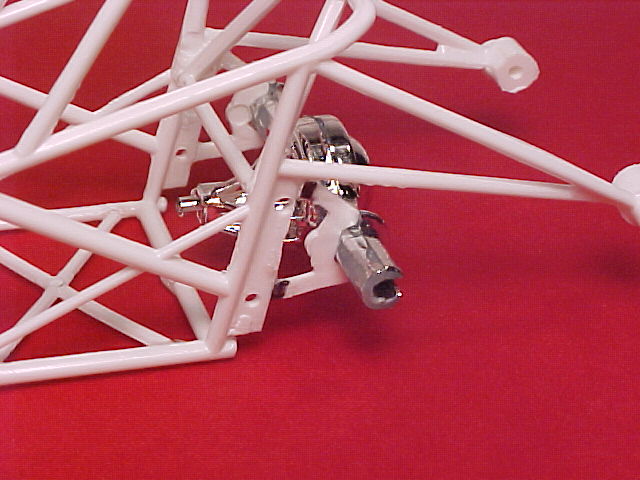 The other basic adjustment to be made is the throw away the ugly two piece slicks that come with the kits and replace them with more modern Revell/Monogram slicks that more resemble the size of tires that were run back in the day. 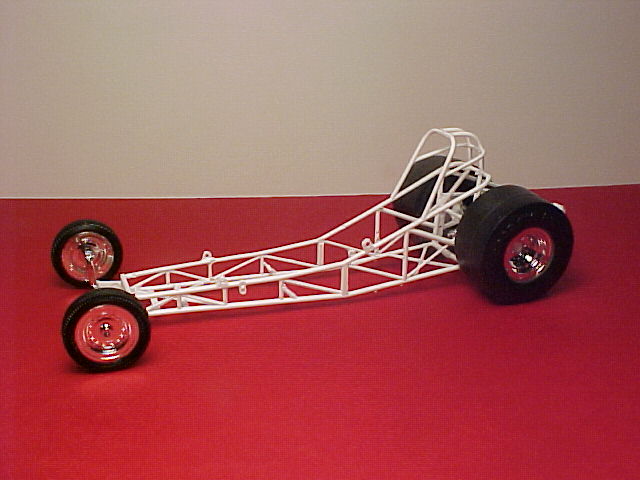 Here are two before pics. 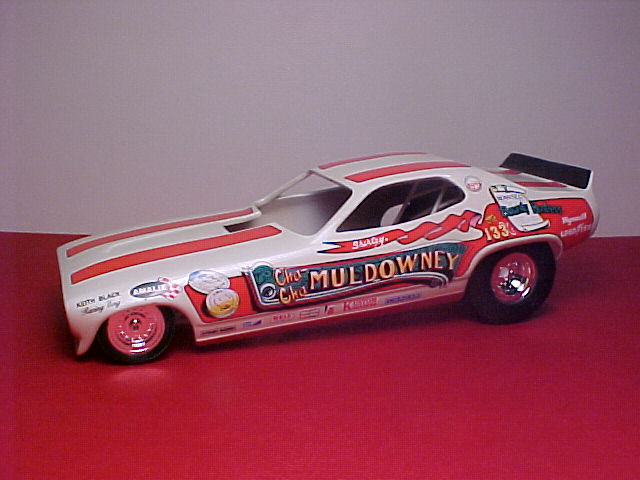 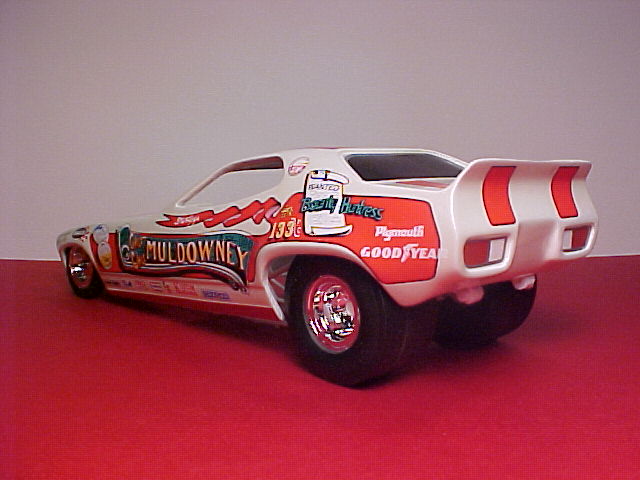 And then the after. 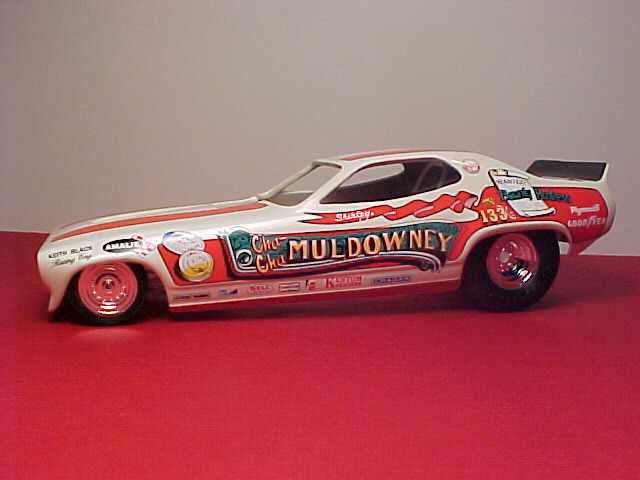 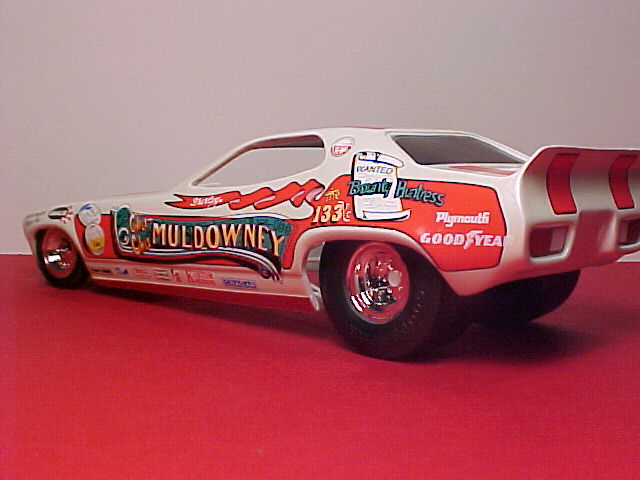 And on some of the body styles these adjustments require that you also chop the roll cage down in order for the body to close perfectly. 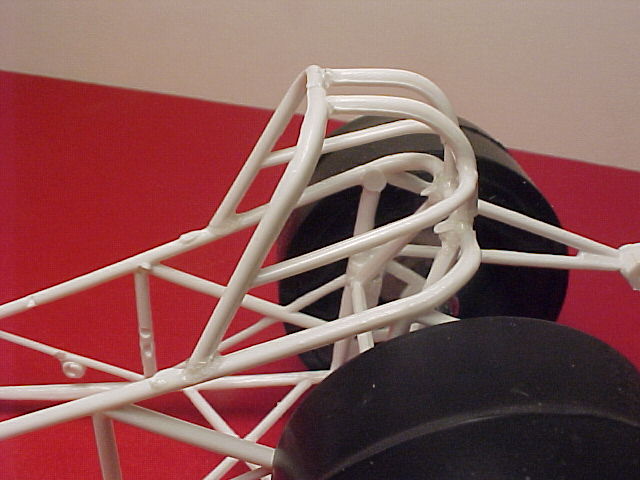 That's it for now. There is more but I will post the next installment in a couple of days. |
|
Interceptor
Pit Crew
 Age doesn't kill the need for speed
Posts: 51
|
Post by Interceptor on Aug 27, 2008 15:50:36 GMT -6
I totally agree.  Mark |
|
|
|
Post by hondo on Aug 27, 2008 18:14:18 GMT -6
Wayne,
Just as info, your pictures of the rear end mountings tabs are the same.
Thought it may confuse those who haven't tried this before.
I have thoroughly appreciated this info since the first time I received it. Use it everytime on my chassis.
(You know I'm not being critical.......I apprecaite all you do for us funny car builders !)
Hondo
|
|
|
|
Post by 1320wayne on Aug 28, 2008 12:08:44 GMT -6
Thanks Hondo. I inserted the same picture twice. The correct one is in place now.
|
|
|
|
Post by 1320wayne on Aug 28, 2008 12:23:20 GMT -6
And as promised, here is part two. There are additional adjustments that can be done to enhance the stance of these builds. Some different body styles can still be too high even after making the adjustments mentioned above. Here is a picture comparing two Charger bodied builds between the basic adjustments and the advanced adjustments. 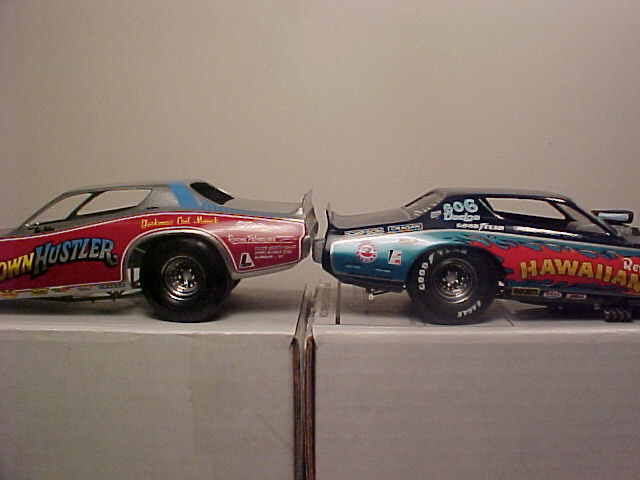 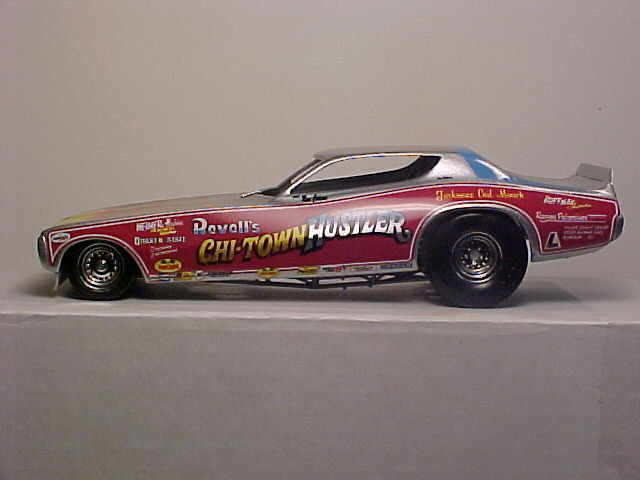 To further lower these bodies start by marking the body braces, front and rear, as shown and cutting out the excess material. 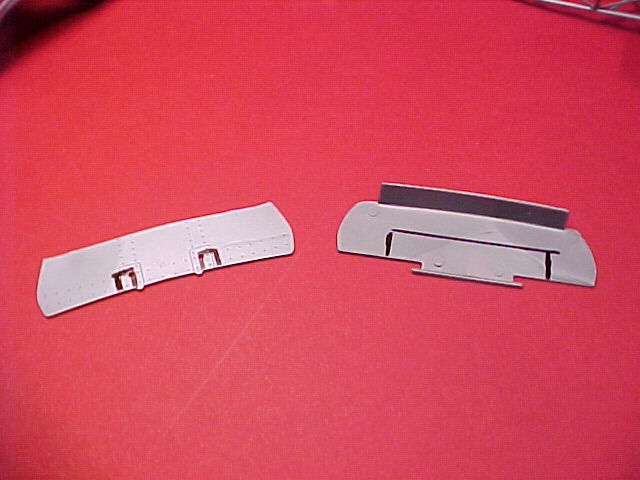 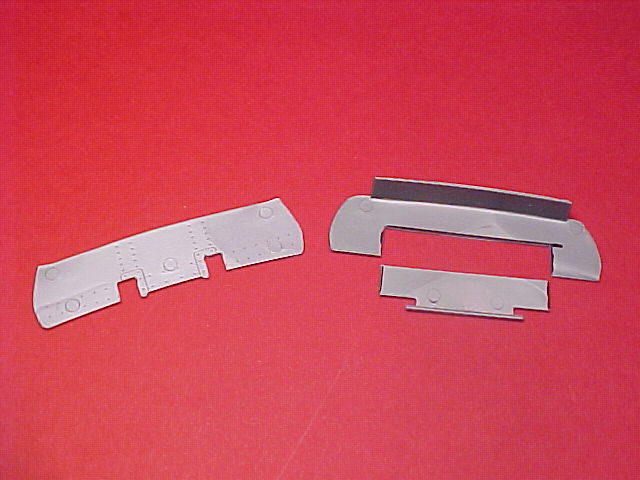 After you have done this the front brace is ready to be painted and installed. The rear brace will need to be cut down. Take the piece that you cut off and remove about an 1/8 of an inch and reattach in the same place that you just cut it from. 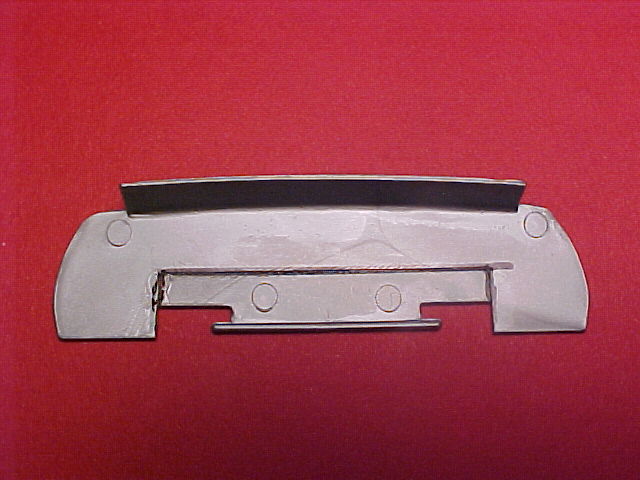 Sand the piece to get it ready for paint and shave the sides of the pins inward so the frame mounts will fit on the body brace without being spread out too far. Now the next pic. will show you how the body will now sit with these adjustments made. 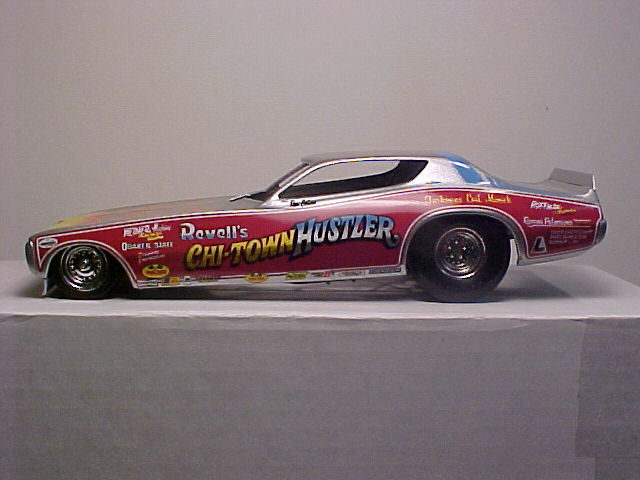 Now, by making all of these added adjustments you will most likely have to make some tweaks in other areas. Such as, you might have to widen the opening for the interior tin now that the body is going to sit lower on the chassis, as well, you will probably have to enlarge the blower opening in the body just a bit because the engine will be sticking out just a bit further also. Make sure that you test fit everything before final assembly to be sure that it will all go together properly. Hopefully you will be happy with the results when you are finished. If anyone would like this tutorial in a PDF format for you to save on your own computer I have it in that format and I can email it to you. Just send me a PM with your email address and I can send it to you. |
|
|
|
Post by Administrator on Aug 29, 2008 19:15:08 GMT -6
Thanks for the tutorial Wayne. I will definitely be using this on my upcoming Gene Snow and Ed McCullough cars. Consider this post stickied guys!  |
|
|
|
Post by roadwarrior on Aug 30, 2008 21:09:01 GMT -6
This is great, Thanks for the tips!
|
|
|
|
Post by Snake2 on Sept 22, 2008 6:03:52 GMT -6
Excellent tips. Thanks.
|
|
|
|
Post by raydee53 on Feb 6, 2009 13:06:42 GMT -6
Could you show the difference between the slicks that come in the kit and the slicks you use? Also what kit do they come in? Is there another alternative kit source you would suggest for using for slicks?
|
|
|
|
Post by hondo on Feb 6, 2009 14:31:50 GMT -6
If Wayne doesn't mind me jumping in here to add something. Here's a picture of the funny car slicks: 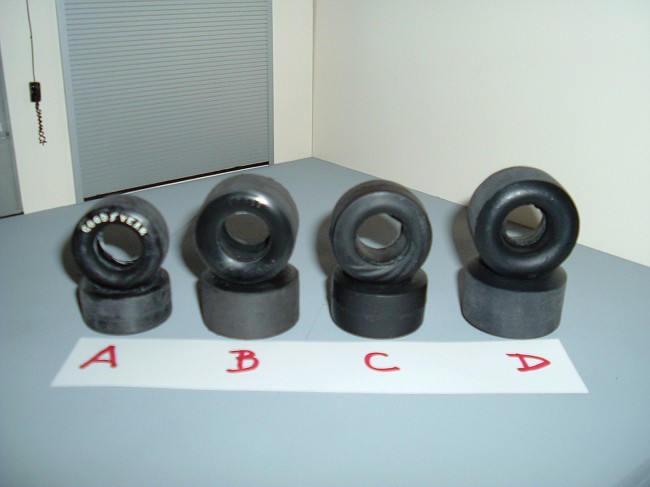 A: This is the early Revell funny car kit slicks (2 pc.) B: These are the later Revell funny car kit slicks (2 pc.) They are little taller and wider, but better. C: These are the Competition Resins "70s Wrinkle wall" slicks Almost excatly the same size as the later Revell kit slicks. (1 pc.) D: These are the late model funny car tires available from Comp Resins (or Slixx also has them) Even taller and wider (1 pc.) Also related to this subject. When moving the rear end housing tabs up......... Sometimes the driveshaft will hit the seat bottom. You can correct that problem by cutting the seat, horizonally and removing a small section. The top of the seat will mount at the same place on the chassis, but the bottom is a little higher. 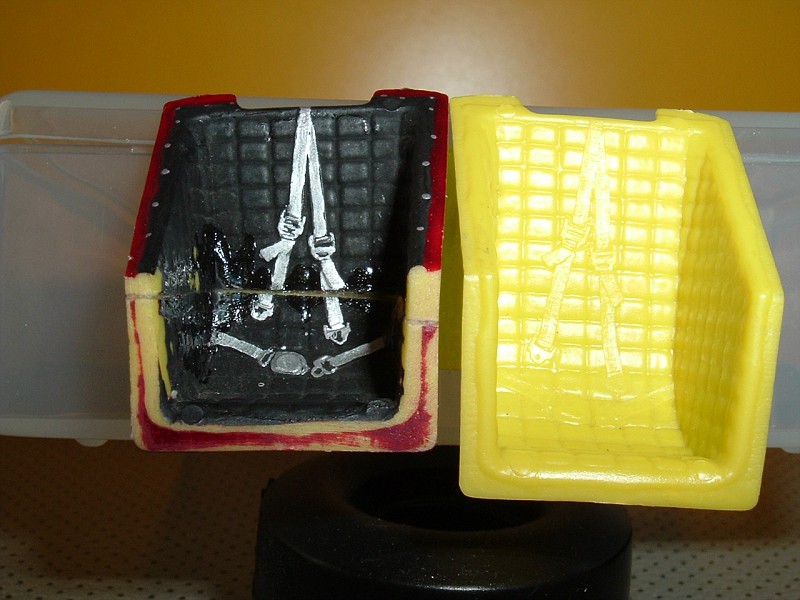 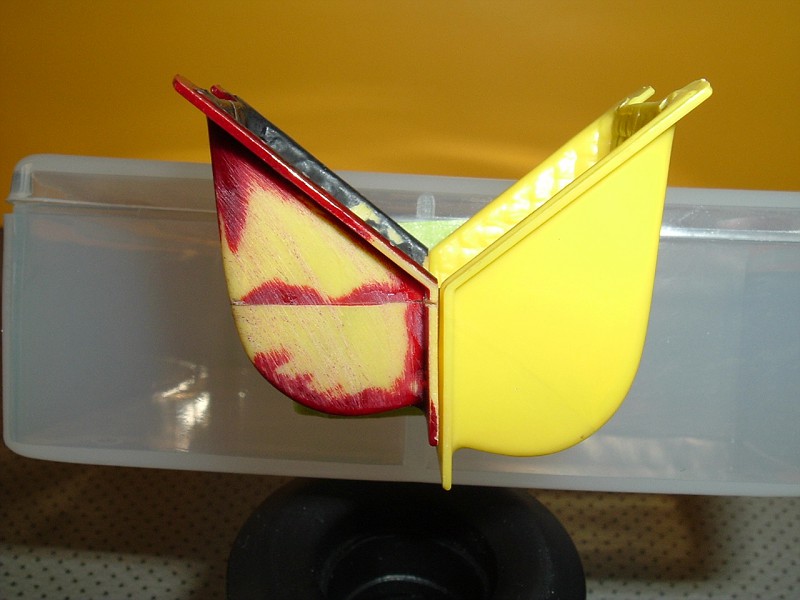 A little work on the seat and paint will make it just fine. Hondo |
|
capsgs
Pit Crew
 Wouldn't You Really Rather Have A Buick
Posts: 142
|
Post by capsgs on Feb 7, 2009 17:34:13 GMT -6
Jim, It looks like you foung that problem at the same time I did. After the seat was painted!!
|
|
|
|
Post by 1320wayne on Aug 21, 2009 6:06:10 GMT -6
If anyone needs this in a saved format Model Cars Mag just ran this as an article in their most recent issue that is hitting the hobby store shelves as we speak.
|
|
aafcfan1
Pit Crew
 Funny Cars Forever
Posts: 165
|
Post by aafcfan1 on Nov 6, 2010 9:10:44 GMT -6
Wayne, I have used your tutorial on the proper stance for Revell 70's funny cars with some success ( see my post Jungle Jim finally finished in the funny car section) but I have a question. I know you have to alter the seat, but do you make any modifications to the chassis to make the wheelie bars fit correctly? To mount the wheelie bars in the normal position after raising the rear end mine did not fit correctly. I altered them to fit but was wondering how you do it. Thanks aafcfan1
Buy the way, that was one tutorial that got me excited about building again after a long modeling slump. Great tutorial and thanks for posting it.
|
|
|
|
Post by 1320wayne on Nov 6, 2010 20:38:24 GMT -6
Wayne, I have used your tutorial on the proper stance for Revell 70's funny cars with some success ( see my post Jungle Jim finally finished in the funny car section) but I have a question. I know you have to alter the seat, but do you make any modifications to the chassis to make the wheelie bars fit correctly? To mount the wheelie bars in the normal position after raising the rear end mine did not fit correctly. I altered them to fit but was wondering how you do it. Thanks aafcfan1 Buy the way, that was one tutorial that got me excited about building again after a long modeling slump. Great tutorial and thanks for posting it. The only thing that I have found needs to be done is that by raising the rear end the top bar of the wheelie bars doesn't want to fit correctly. At first I tried to fix that by simply cutting the top bar away from the mounting bracket and then after installing try to remount the top bar in place. It was a chore. What I eventually found was that if I slowly work at re-arching the top bar (without cutting it away) I can get it to where the mounting bracket will install just like in the instruction sheet and the top bar clears the rear end housing. All builds since have worked out with no problems. |
|
aafcfan1
Pit Crew
 Funny Cars Forever
Posts: 165
|
Post by aafcfan1 on Nov 7, 2010 16:12:42 GMT -6
Thanks Wayne, I really appreciate your input and I will give it a try.Thanks again aafcfan1. What a great place for learning and sharing info in order to build better drag models
|
|