Deleted
Deleted Member
Posts: 0
|
Post by Deleted on Mar 12, 2018 13:15:19 GMT -6
I'd like to hear how you modeling gurus make chrome headlights look better (more realistic). I have a few kits I've looked through that simply have the headlights in chrome right long with the bumper and/or grill. I know the absolute best solution would be to drill out the headlight, then put a chrome back in place, covered by a glass lens. What I would prefer would be a way to improve the look of the headlights without going to that extent.
So, what do you guys do? Is there a "best" thing to use to coat them with? Please keep in mind you'll be recommending a solution to a relative "newbie". I'm just looking for a simple means of improving the realism of the headlights.
|
|
david
Junior Dragster Champion

Posts: 302
|
Post by david on Mar 12, 2018 14:10:52 GMT -6
When I come across chrome headlights and want to go the easy way, I use a small bottle of the Testor's Gloss White and then put a few drops of it in small cup or some otherwise throwaway container. You don't need much, just enough to load up a small brush a few times. I get a little on the brush and then dip it into the Testor's Enamel thinner (brush cleaner) and squish the brush a little in the neck of the Thinner Bottle so as to thin out the paint. I'll often dip it real quick back into the bottle and just touch the side to remove a little excess thinner/paint. Now you can just touch the headlight (holding it horizontally) and the mostly thinner/little paint will just flow onto the headlight, dropping into the recesses and leaving the ribs kind of exposed. Since it's mostly thinner it will dry fast so just set it off keeping it relatively level and in a few minutes it will "set up". In essence, you are making a white "wash" and using it to "shade" the headlight. It's the same technique you would use with flat black to "wash" a grille or valve covers or some other chrome for detail. If you get too much paint, just dab your brush onto some paper towel and then put it back into a headlight crevice and it'll wick some of it back off. If you don't like it at all, just dab a Q-tip into your brush cleaner, dab it onto a paper towel to take off the excess, and then wipe the paint off and start again. Like anything, the first time I did it I was puckered up pretty tight and now I can do them in my sleep; it's that easy. Just practice around a little bit and in no time, chrome headlights are no problemo! Here's an example on an old Johan kit I finished recently. Hope this helps in some way! 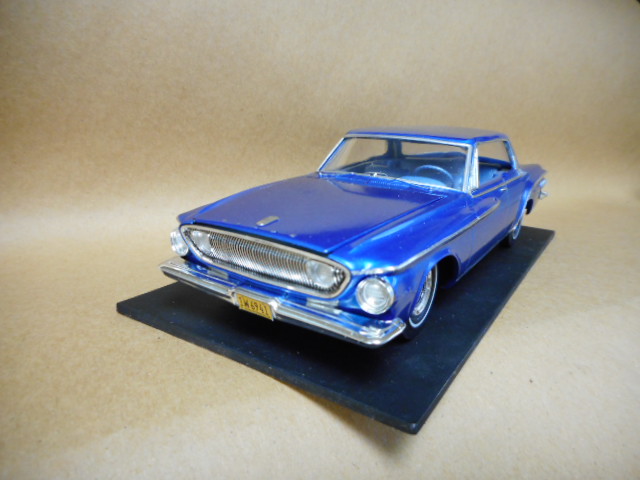 |
|
|
|
Post by 41chevy on Mar 12, 2018 18:22:37 GMT -6
After you get Davids tricks done, give it a thin coat of Tamiya X19 Clear Smoke. It give it a shadowy depth.Works good on clear lights also.
|
|
david
Junior Dragster Champion
Posts: 302
|
Post by david on Mar 12, 2018 18:41:54 GMT -6
Very interesting touch Paul! Do you have a good picture of how that looks? I will certainly add it to the arsenal. Do you spray it or brush it?
|
|
|
|
Post by 41chevy on Mar 12, 2018 18:57:57 GMT -6
Very interesting touch Paul! Do you have a good picture of how that looks? I will certainly add it to the arsenal. Do you spray it or brush it? Look at the Revell Anglia build of mine here. I use a brush heavy around the edges and light in the main light area. quartermilers.proboards.com/thread/4442/bb-anglia |
|
david
Junior Dragster Champion
Posts: 302
|
Post by david on Mar 12, 2018 20:09:11 GMT -6
That looks really good Paul. Those were chrome headlights on that Anglia? They look great man! Maybe a little tutorial on exactly how you do this sometime in the future? I'd sure like to learn. Thanks again!
|
|
|
|
Post by 41chevy on Mar 12, 2018 21:02:31 GMT -6
That looks really good Paul. Those were chrome headlights on that Anglia? They look great man! Maybe a little tutorial on exactly how you do this sometime in the future? I'd sure like to learn. Thanks again! Easy. A silver enamel paint pen over the chrome lens area, Tamiya weak black/alcohol wash, a thin coat of 5 minute epoxy, which gives the lens a bit of reflective depth and after a day to gas out the Tamiya clear smoke. Paul |
|
Deleted
Deleted Member
Posts: 0
|
Post by Deleted on Mar 12, 2018 23:59:45 GMT -6
OK, guys. I hadn't run across either of your tips anywhere else. I believe I'll have to try it your way, or ways, I guess.
|
|
|
|
Post by 70sprostockfan on Mar 13, 2018 7:40:52 GMT -6
Thanks for asking Steve. I've been drilling them out and putting in a backing and all this and they don't look as good as these do! I've definitely learned something that I'm gonna try out soon!
|
|
|
|
Post by 41chevy on Mar 13, 2018 11:14:58 GMT -6
One other thing I do occasionally is use the correct size MV Lens
|
|
david
Junior Dragster Champion
Posts: 302
|
Post by david on Mar 13, 2018 11:32:24 GMT -6
What is an MV lens?
|
|
Deleted
Deleted Member
Posts: 0
|
Post by Deleted on Mar 13, 2018 13:03:54 GMT -6
OK. Question for either of you, David or Paul. (or anybody else that knows) I have some of the washes by "The Detailer" (black & gray plus some others). Could I use the gray wash over either the thinned Testor's Gloss White or the silver enamel paint pen? Then, if I did, can that then be coated with epoxy or something else to give depth? Link to The Detailer www.thedetailer.net/order.htm |
|
david
Junior Dragster Champion
Posts: 302
|
Post by david on Mar 13, 2018 13:19:28 GMT -6
Those Detailer Washes are all water based acrylics I believe so they can go over anything(lacquer, enamel, etc-anything that is not water based). That also means that you can coat it with anything that is NOT water based. Having said that, a coat of Future will separate layers so that for something small like this, the "LEA Rule" won't matter so much. The cheap "Testor's Clear Parts Cement and Window Maker Glue" works pretty well for headlights, gauge faces, etc. Paul might have much more insight into this as I do not use The Detailer washes although I have heard many good things about them.
|
|
|
|
Post by 41chevy on Mar 13, 2018 19:01:23 GMT -6
|
|


