|
|
Post by 70sprostockfan on Mar 21, 2018 20:25:11 GMT -6
You got a grumpy old man grinning over here! As Paul said builders choice on over or under. I'm rooting for you but then again I was rooting for UNC against Texas A&M the other day so I don't know if that's a good thing or not.
|
|
david
Junior Dragster Champion
 
Posts: 302
|
Post by david on Mar 22, 2018 0:35:12 GMT -6
After seeing the tutorial, I got excited and even though I got home late I wanted to start working on those leaf springs. I did not have a jig but I found something that worked pretty well. The top of your Tamiya Masking tape dispensers are just about right. I taped the top on one, then sliced my leafs. I did not have any .015 x ..080 but I did have some .020 x .080 so I used that. I cut two each at 35, 31 ans 28mm as suggested. I rounded the corners and did a little "finger-bending" in order to get the general arc down. I taped the first (longest) leaf down and then glued my other two on using my center mark to line things up. 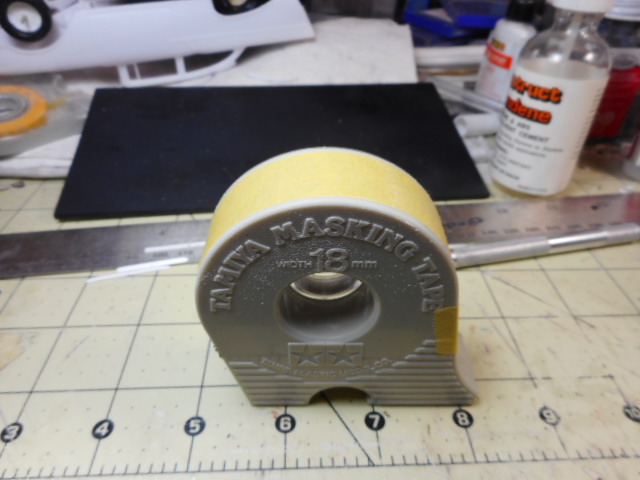 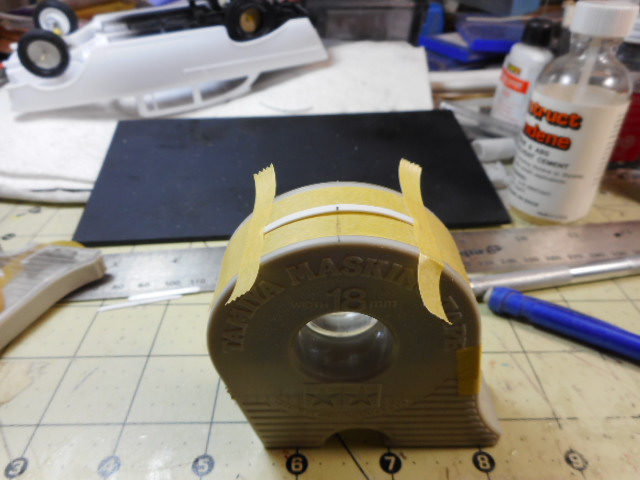 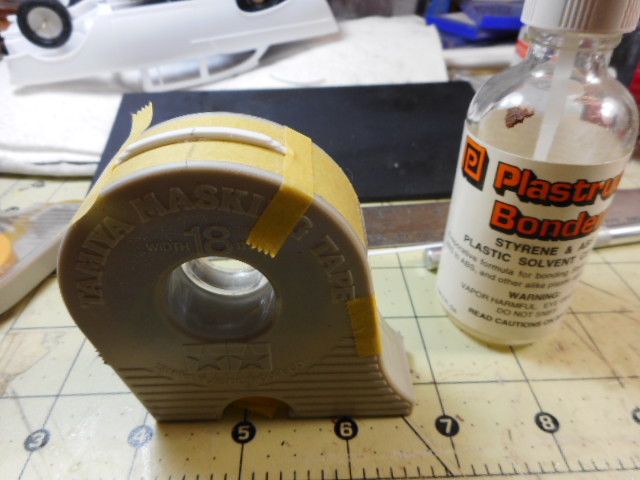 They dry quickly and you can remove the underlying tape and then peel it back and the leaf spring will easily come loose without deforming. I then used my "ticky-tak" and spotted the leafs in place as well as the straight axle, just for a quick mock-up. I wasn't real precise and was more excited to see what it looked like than anything else! 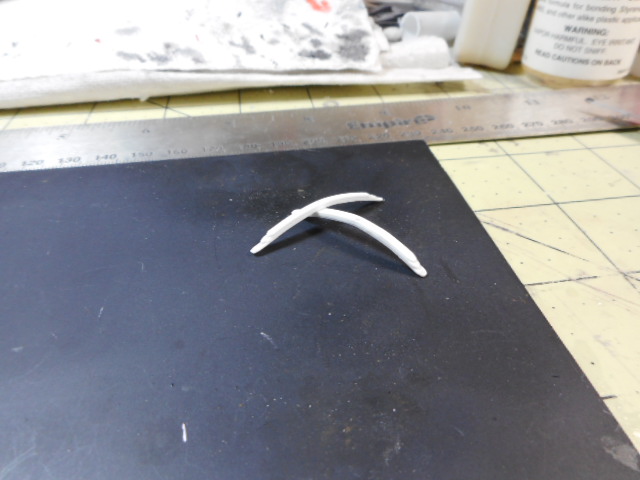 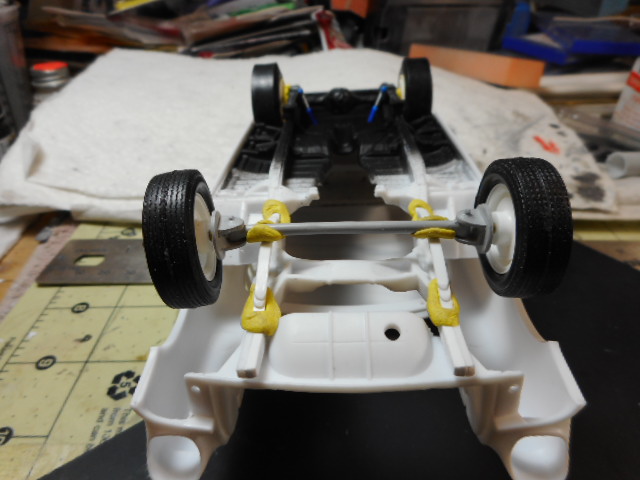 Hey, not too bad! I did not have any rectangular tubing that would work for shackles so I'll get some tomorrow. In the meantime, considering the ticky-tak is kind of thick and I didn't really press it all down much, I think the final will set about right. I might notch into the frame just a tad but when we get closer we'll see. 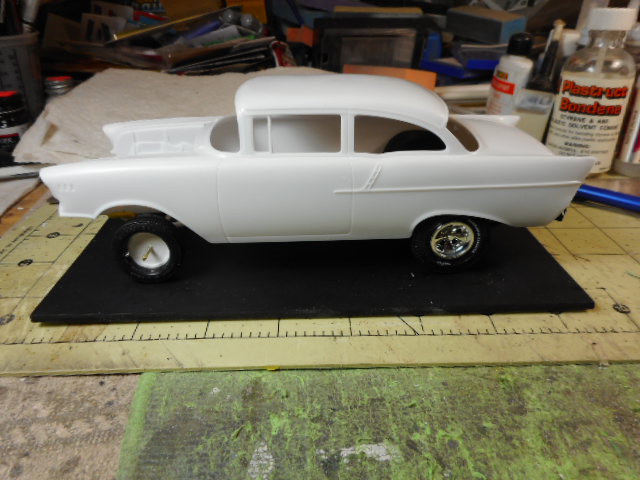 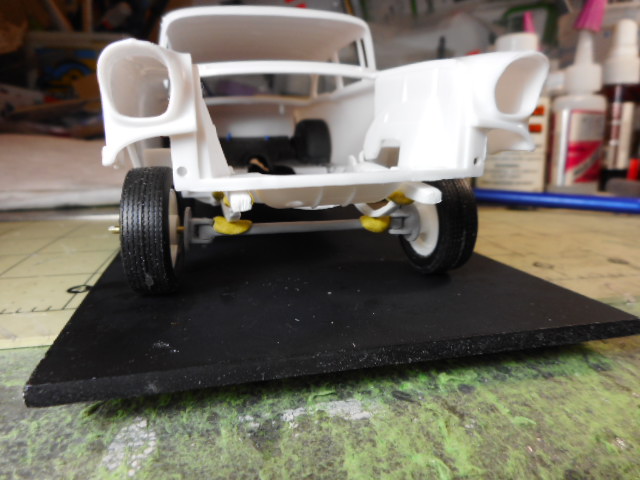 And by the way, I don;t know what you fellas use but this ticky-tak (actually it's called HandiTak) has really been good to me. You can use it over and over and an entire package costs 1.99 at Bed, Bath and Beyond (or probably a big-box office store). You don't want to glue things but you do want to hold them in place for measuring and mock-up? You might try this stuff, pretty good! 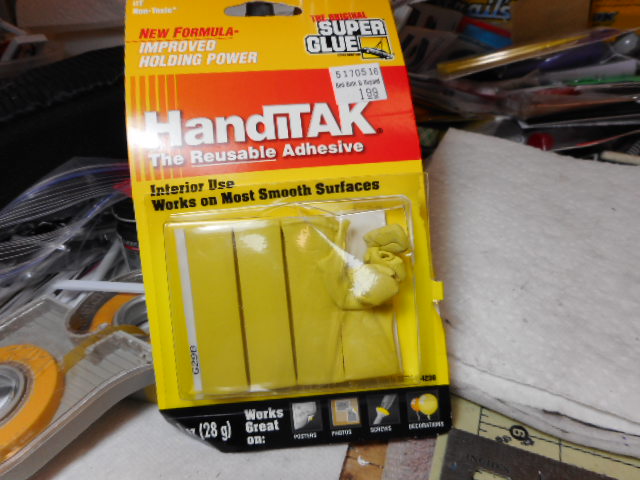 I can't thank Paul enough for his tutorial on this and the Forum for making it a Sticky. I used his general principles and just winged it from there (the Tamiya Tape dispenser for instance). It works Paul, thanks! And if I can do it, ANYONE can do it!  |
|
|
|
Post by 68383 on Mar 22, 2018 4:57:08 GMT -6
Good stuff! Nicely done.
|
|
|
|
Post by 70sprostockfan on Mar 22, 2018 7:04:00 GMT -6
You did good. I believe you've got it. Between you and Paul I believe it's time to start getting my fingers sticky. Lookin good
|
|
david
Junior Dragster Champion
 
Posts: 302
|
Post by david on Mar 23, 2018 13:39:22 GMT -6
|
|
|
|
Post by 41chevy on Mar 23, 2018 20:25:10 GMT -6
It sits well,it has a very good stance! Paul
|
|
david
Junior Dragster Champion
 
Posts: 302
|
Post by david on Mar 30, 2018 13:24:50 GMT -6
|
|
Deleted
Deleted Member
Posts: 0
|
Post by Deleted on Mar 30, 2018 13:55:10 GMT -6
Looking REAL good.
|
|
|
|
Post by 68383 on Mar 30, 2018 14:22:28 GMT -6
Sweet!
|
|
|
|
Post by 70sprostockfan on Mar 30, 2018 14:24:32 GMT -6
It's a gonna be a nice one!
|
|
|
|
Post by 41chevy on Mar 30, 2018 21:12:40 GMT -6
Nice work on the mouse motor and the interior, looks great! I see you put a spreader bar on it, period perfect too. No drive shaft loop will get you booted out of tech though  |
|
david
Junior Dragster Champion
 
Posts: 302
|
Post by david on Apr 3, 2018 12:29:11 GMT -6
Hoop is scratched and installed and paint is one the car. A week of curing, then BMF and details.
|
|
59impala
Junior Dragster Champion
 
Posts: 287 
|
Post by 59impala on Apr 5, 2018 20:55:31 GMT -6
This is one fine 57 fer sure. Nice work David.
|
|
david
Junior Dragster Champion
 
Posts: 302
|
Post by david on May 30, 2018 9:37:55 GMT -6
|
|
|
|
Post by 68383 on May 30, 2018 11:51:04 GMT -6
Very nice!
|
|