david
Junior Dragster Champion
 
Posts: 302
|
Post by david on Mar 20, 2018 13:56:29 GMT -6
|
|
Deleted
Deleted Member
Posts: 0
|
Post by Deleted on Mar 20, 2018 14:58:46 GMT -6
Hey, David. Thanks for taking the time to walk us through what all you're doing. I know the old timer, modeling pros probably aren't nearly as interested as a "re-newbie" like me, but I really do appreciate the photos with the explanations. That being said, I have questions.
1) Why did you decide to remove the spare tire well? Was it purely cosmetic, or did it interfere with something else you intended to do?
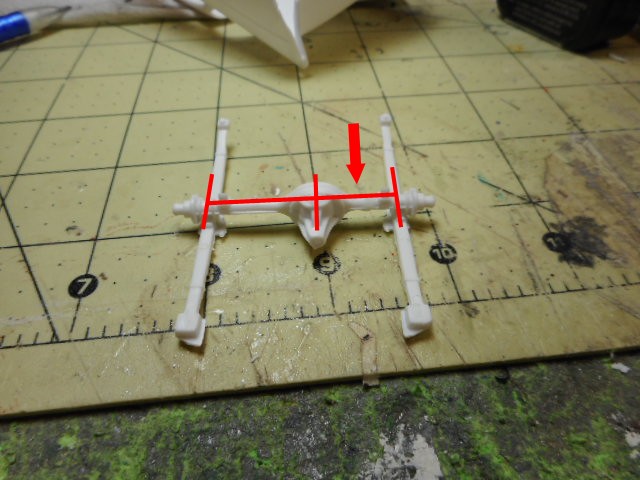
2) I must be blind as a bat, but I'm not seeing the difference between sides in the second photo. I've read that explanation over about a dozen times while looking at the photo and I just don't see what you're talking about. Any chance of you pointing out what you're referring to in that photo?
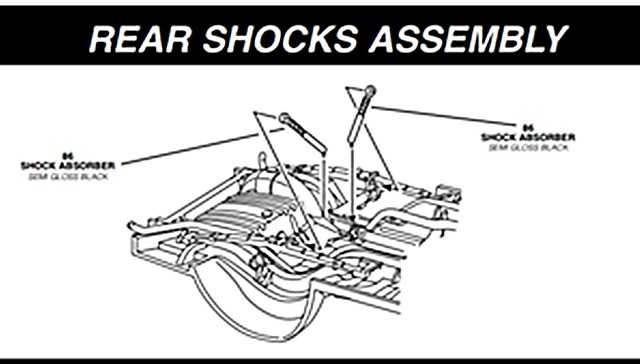
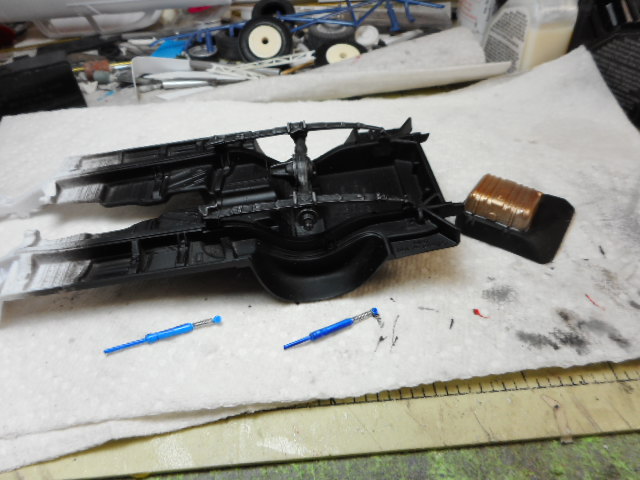
3) You stated that you, "lengthened the kit shocks". I know I'm going to run into this fairly soon when I start building and I've wondered how to lengthen the shocks. Could you give a quick explanation as to how you did that?
|
|
|
|
Post by 68383 on Mar 20, 2018 15:23:33 GMT -6
2) I must be blind as a bat, but I'm not seeing the difference between sides in the second photo. I've read that explanation over about a dozen times while looking at the photo and I just don't see what you're talking about. Any chance of you pointing out what you're referring to in that photo? 3) You stated that you, "lengthened the kit shocks". I know I'm going to run into this fairly soon when I start building and I've wondered how to lengthen the shocks. Could you give a quick explanation as to how you did that? Looks like he narrowed the right side of the rear end in the picture. Regarding the shocks, I'm not sure what method he used, but I've lengthened some by using metal tubing. Hope this might help. |
|
david
Junior Dragster Champion
 
Posts: 302
|
Post by david on Mar 20, 2018 16:33:22 GMT -6
First off, I am no expert by any stretch and I only try to show things I do in order for others to learn or for me to learn better ways of doing things from them. Anything that helps us all at our bench helps us all as a community of builders. I removed the spare tire well just because it was unsightly and it may/may not interfere with some wheelie bars later on should I decide to include some. I tried to highlight the narrowing of the rearend for you visually and hopefully now you can better see how the right side where I removed 3mm is much narrower than the stock side on the left.  ON the shocks, I took the kit shocks and added a small piece of styrene tubing to the bottom that was the same OD diameter as the shocks. I then stuck a piece of styrene rod into that extension. I left the rod extensions long and trimmed them off after I inserted them into the kit frame holes for the shock mounts. I did not take a picture of the kit shocks but maybe this instruction page will "sort of" show the difference in the stock shock and my lengthened one. With my rear axle raised from it's stock position the kit shocks were never going to reach, hence the lengthening.   |
|
|
|
Post by 41chevy on Mar 20, 2018 22:29:34 GMT -6
Hey, David. Thanks for taking the time to walk us through what all you're doing. I know the old timer, modeling pros probably aren't nearly as interested as a "re-newbie" like me, but I really do appreciate the photos with the explanations. That being said, I have questions. 1) Why did you decide to remove the spare tire well? Was it purely cosmetic, or did it interfere with something else you intended to do? Most gassers from the day the gas tank was replaced with a Moon tank. The spare tire well allows the area of the trunk floor to be filled and a truck battery installed in that area. My 55 lost it's tank and spare tire well in 1962. Pretty much S.O.P. Also makes it easier to get under the back to work if needed. Not such thing as not learning too much. I've been racing and building models for more than half a century and still learn new stuff every day. . .or else I'm just senile  Can't pass on knowledge you have to those who want it than you might as well achieve room temperature. |
|
david
Junior Dragster Champion
 
Posts: 302
|
Post by david on Mar 21, 2018 0:22:58 GMT -6
Good knowledge Paul and I'll see if I can pop that tank out. I try to build satisfying shelf models and sometimes my technical "accuracy" is off either because I don;t know the particulars about something or I just get "lazy"  . But that's the value of a forum like this; now I know that the spare tire well AND the tank usually went away!! Good stuff!  |
|
|
|
Post by 70sprostockfan on Mar 21, 2018 6:49:06 GMT -6
All right buddy you are cookin' with gas now!! I like this one. This kit is almost impossible to get any rear tire under the body work (which is realistic because the actual car was that way too). Good job of catching it early and solving the problem.
|
|
|
|
Post by 41chevy on Mar 21, 2018 9:49:33 GMT -6
Good knowledge Paul and I'll see if I can pop that tank out. I try to build satisfying shelf models and sometimes my technical "accuracy" is off either because I don;t know the particulars about something or I just get "lazy"  . But that's the value of a forum like this; now I know that the spare tire well AND the tank usually went away!! Good stuff!  Look at this, see last photo. Same as my real car was done. quartermilers.proboards.com/thread/4258/class-warfare-57-chevyI build to make me smile, other people liking it is a bonus. One FYI for the rivet counters accuracy  The old rules do not allow the center of the wheels to be below the bottom of the rockers. Sky high is a no no  |
|
Deleted
Deleted Member
Posts: 0
|
Post by Deleted on Mar 21, 2018 13:22:11 GMT -6
OK. Thanks to all you guys for taking the time to answer my questions, and to also provide additional info. I've got it straightened out in my head now. All of your replies were helpful. I really appreciate you guys explaining stuff like this. It helps a bunch!   David, keep on posting up photos and offering details. It's invaluable to me, and probably a few more guys. And a '57 Chevy gasser to boot.  |
|
david
Junior Dragster Champion
 
Posts: 302
|
Post by david on Mar 21, 2018 15:18:36 GMT -6
|
|
|
|
Post by 70sprostockfan on Mar 21, 2018 16:50:55 GMT -6
lookin good ! I've got a couple of projects I'm working on now that need front axles so this couldn't have come at a better time. I'm really looking forward to seeing how you do the leaf springs without raising the front end up way too high. Which has always been one of my problems on the shoe box chevys.
|
|
david
Junior Dragster Champion
 
Posts: 302
|
Post by david on Mar 21, 2018 17:03:04 GMT -6
Yep ALlen, I'll be interested to see how I do that myself!  I may not be the best scratch builder but I am pretty fearless so over the next night or two I'll jump into it! I'm sensing that these will be pretty short and pretty "flat". I can also envision them running underneath the axle instead of on the top. Can I do that or were all of them on top of the axle?  |
|
|
|
Post by 41chevy on Mar 21, 2018 17:58:45 GMT -6
|
|
david
Junior Dragster Champion
 
Posts: 302
|
Post by david on Mar 21, 2018 19:50:29 GMT -6
Well dang Paul! I followed your link and that's all I needed to know! I had no idea that this was on here or I would not have even bothered. Great stuff and I'll just pretty much work from your tutorial from here on out!! Great stuff!!! Thanks!!
|
|
|
|
Post by 41chevy on Mar 21, 2018 20:21:25 GMT -6
Well dang Paul! I followed your link and that's all I needed to know! I had no idea that this was on here or I would not have even bothered. Great stuff and I'll just pretty much work from your tutorial from here on out!! Great stuff!!! Thanks!! You method is excellent also. IMO. I like the ability to shorten the axle easily. Paul |
|