|
|
Post by mustang1989 on Apr 19, 2020 8:03:12 GMT -6
Nice work! It's the little details that will make the car special. Thanks Steve! |
|
|
|
Post by mustang1989 on Apr 20, 2020 4:10:44 GMT -6
You know fellas.....every once in a while you have to negotiate a TRUE hurdle in modeling. Sometimes it's paint, sometimes it's fit and sometimes it's things like I've been going through for the past week.....the assembly process. I've been building models for a long time and lemme tell ya.....nothing....I mean NOTHING has tested my patience and my abilities as a modeler as much as this aftermarket Liberty shifter from Futureattraction. To put it lightly...this shifter looks absolutely fantastic after it's all been put together. But therein lies the hurdle.....the assembly. At 26 pieces it is one of the most intricate PE items that I have taken on yet. I kid you not....I've got every bit of 7 hours wrapped up in this thing. I had half of it pieced together one morning after spending an hour + on it and the very next day upon picking it up to continue......it all came apart. Yeah....stuff like that and then being under the optivisor the whole time. Eyes hurt...got a headache...got pissed off......contemplated throwing stuff and I think I made up new curse words along the way . Feel free to contact me for the updated curse word list. lol I've still got to cut that one long pin off ( I'm leaving it in place to be able to work with it for shift rods install) and have just a little clean up left to go as far as glue smears but a little thinner and that'll go away. I felt a TRUE sense of accomplishment when I got up from the bench this morning and wanted to show that to you all. The Liberty Shifter: 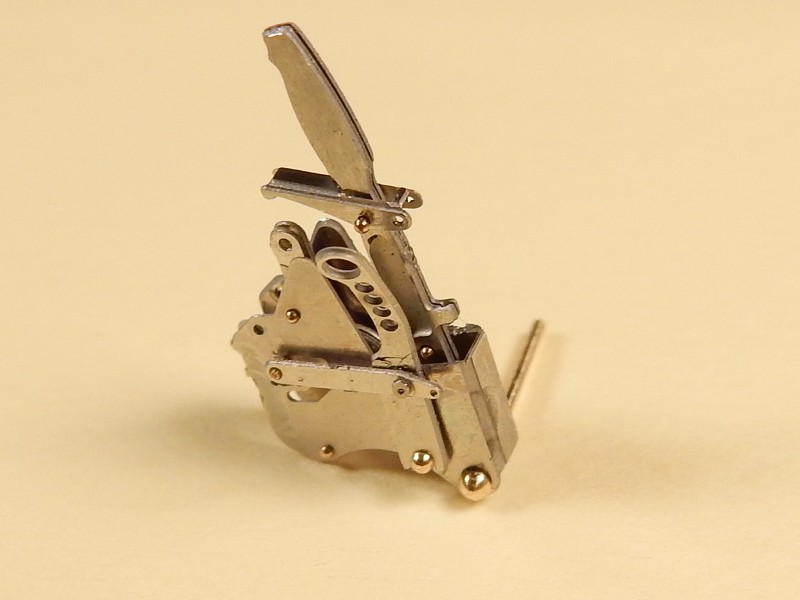 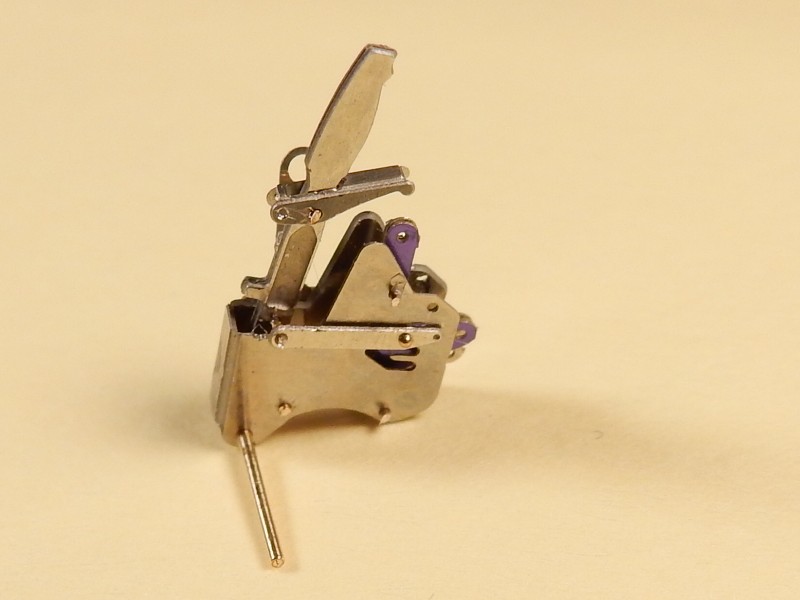 and that scale reference shot: 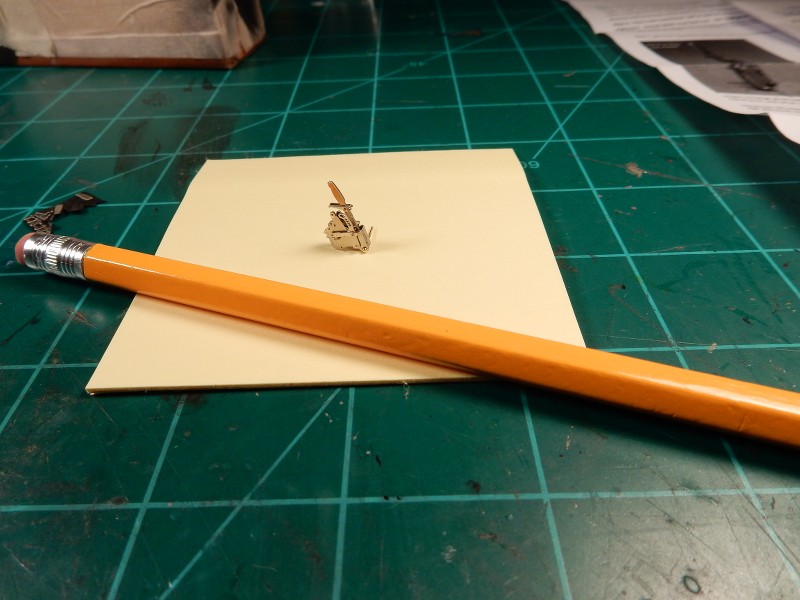 |
|
Deleted
Deleted Member
Posts: 0
|
Post by Deleted on Apr 20, 2020 4:16:55 GMT -6
A 26 piece shifter? For a 1/25 scale model? That's just way over the top.
|
|
stevielewis
Junior Dragster Champion
 Is that....?! What I think that is....?
Posts: 341
|
Post by stevielewis on Apr 20, 2020 4:43:11 GMT -6
That is fantastic. When you want realism there's no better way to go than PE. Nice work!
|
|
Mr. E Modeler
Pit Crew
 Cut me and will I bleed Plum Crazy that smells of Nitromethane!
Posts: 192 
|
Post by Mr. E Modeler on Apr 23, 2020 10:26:21 GMT -6
Good lord man!!! I am surprised you didn't mention a Jeweler's Loop! What a fantastic piece.
I think if I were the one building this model I would have to build it as a shop scene with the shifter on the ground next to the car just so people could see it!
Be sure and let us all know when you go into full-scale assembly mode of those fine pieces I am sure that many of us would be willing to have you to put together one of those beautiful shifters for us. Hell, a few guys might even toss you a few bucks just for doing it for them. Just kidding.
Excellent work sir, my hat is off!!!
|
|
|
|
Post by mustang1989 on May 13, 2020 9:25:19 GMT -6
Sorry for the absence fellas. Just took a small break from this thing after that shifter. Back on it now.
|
|
|
|
Post by mustang1989 on Jul 5, 2020 13:44:17 GMT -6
Working on the rest of the interior now. I didn't like the OOB door panels ………………..at ALL. First off , the OOB armrest and inside door latch handle were barely visible. No "Maverick" trim bezel was present at the top of the trim panel either. Being a car than only sees the track....it's not SUPPOSED to have a window crank handle either....BUT...it was molded in and I decided to install a PE handle and knob from the spares bin. The armrest was made out of spare resin parts block retainers that I had, the door latch handles were made out of square bits of PE that I bent and glued into place and the trim bezel was from extra window crank knobs that I had in stock. Interior in the foreground is OOB with the one I'm using in the back ground..... 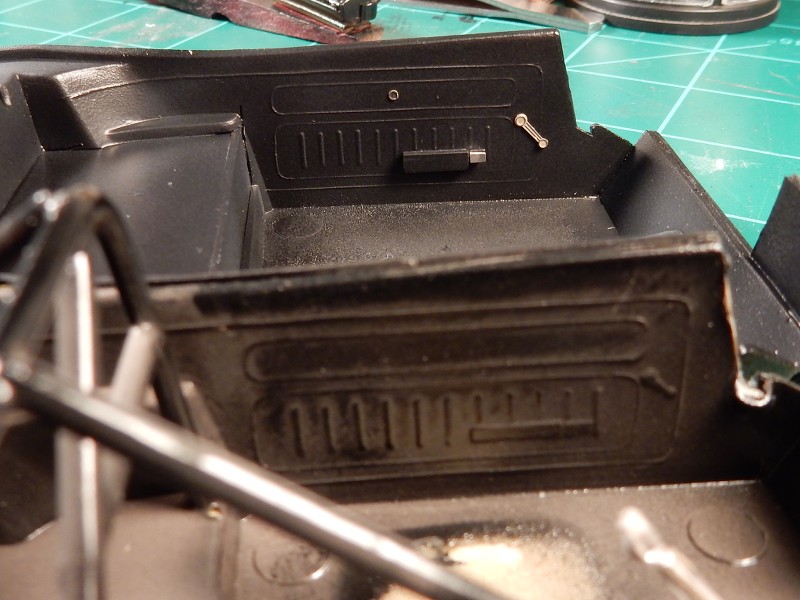 I also managed to get the seat drilled and slotted to make way for the seat belt harness. The harness build up wasn't too bad outside of me not paying attention to what I was doing at times and having to go back and make some corrections along the way. This is not the period correct harness I was hoping to build but the correct one is actually harder than the Liberty shifter that I just built for this car. I'm not about to go through anything like that again on this build. lol  |
|
Deleted
Deleted Member
Posts: 0
|
Post by Deleted on Jul 5, 2020 13:55:34 GMT -6
Some great detail work. The door panels are definitely nicer.
|
|
|
|
Post by mustang1989 on Jul 6, 2020 8:12:48 GMT -6
Thanks for the "Likes" and the comments fellas! Today saw the installation of the shifter. I cut the rods to length as well and will be installing those tomorrow morning. Really adds a lot to the interior.... 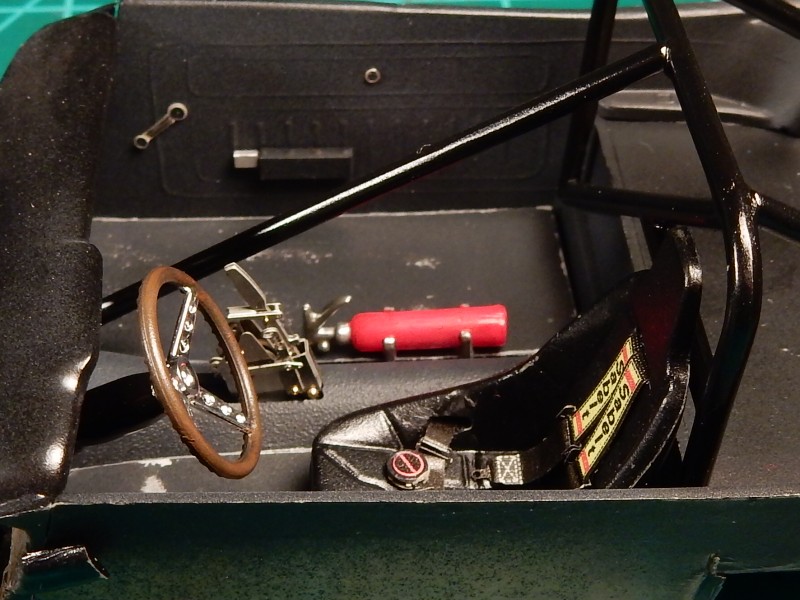 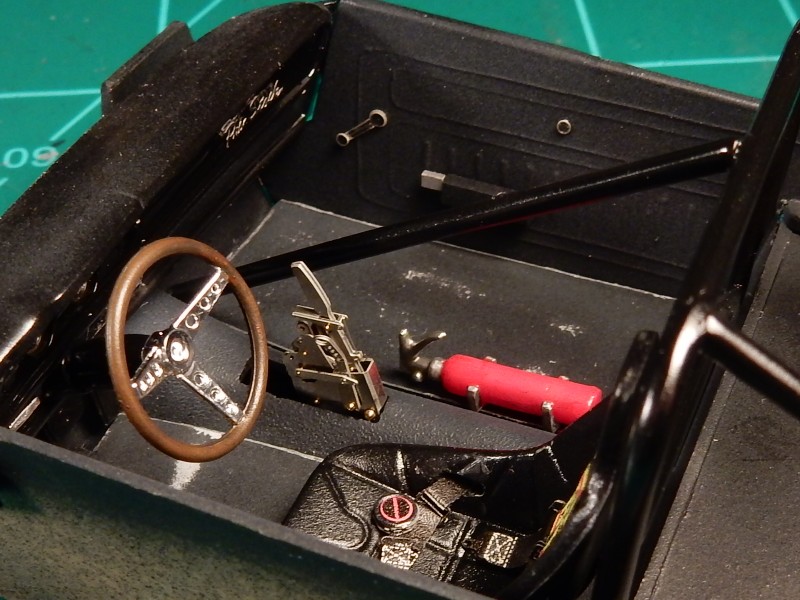 |
|
|
|
Post by 41chevy on Jul 6, 2020 9:42:31 GMT -6
WoW! The details added to the interior make it look real.
|
|
stevielewis
Junior Dragster Champion
Is that....?! What I think that is....?
Posts: 341
|
Post by stevielewis on Jul 6, 2020 16:11:03 GMT -6
I agree with Paul, that does look the real deal.
|
|
|
|
Post by mustang1989 on Jul 7, 2020 8:57:31 GMT -6
Thanks you guys. Managed to get the shift rod/ linkage installed this morning. Now....for that tachometer to top everything off.  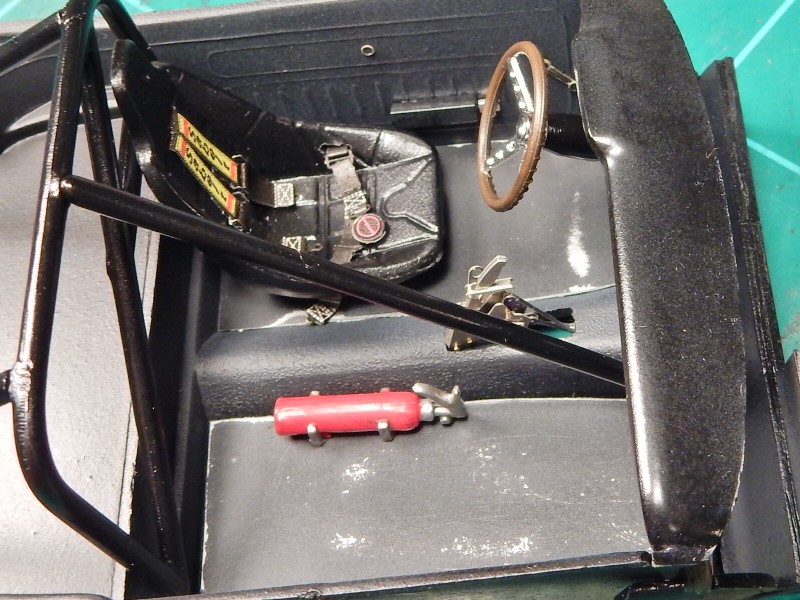 |
|
stevielewis
Junior Dragster Champion
Is that....?! What I think that is....?
Posts: 341
|
Post by stevielewis on Jul 7, 2020 11:16:28 GMT -6
That's looking super! You going to leave the shift assembly bare metal or do some detail painting on it?
|
|
|
|
Post by mustang1989 on Jul 7, 2020 12:25:24 GMT -6
These are bare metal in the real world so I was relieved to see that. lololol. I think I've had enough.....UNCLE!!! LOLOLOL
|
|
|
|
Post by mustang1989 on Jul 10, 2020 8:06:21 GMT -6
|
|


