|
|
Post by styrenesurfer on Oct 15, 2018 13:38:06 GMT -6
tubbs, Yup it's all styrene. The mounting plates are Evergreen .010, leafs are Plastruct .020 x .100. This Plastruct used for the leaves is extruded rather than cut from a sheet the way Evergreen makes theres. The edges are slightly rounded and smoother so I think it ends up looking more like 1-1 leaf springs. The Hubs/Yokes are from a drop axle part from the stash, I cut the axle off and drilled through the hub to fit the rod I'm using for the axle. They need to be further modified a bit. This car is sort of unusual because they put the axle above the leaf springs, it's more common to see it underneath.  |
|
|
|
Post by styrenesurfer on Oct 25, 2018 18:51:40 GMT -6
New front axle finally put together. First the springs were glued to the axle using the chassis as a jig (forgot to take a picture of that) then the U bolts and spring platforms were laced up on the axle and VERY carefully glued. 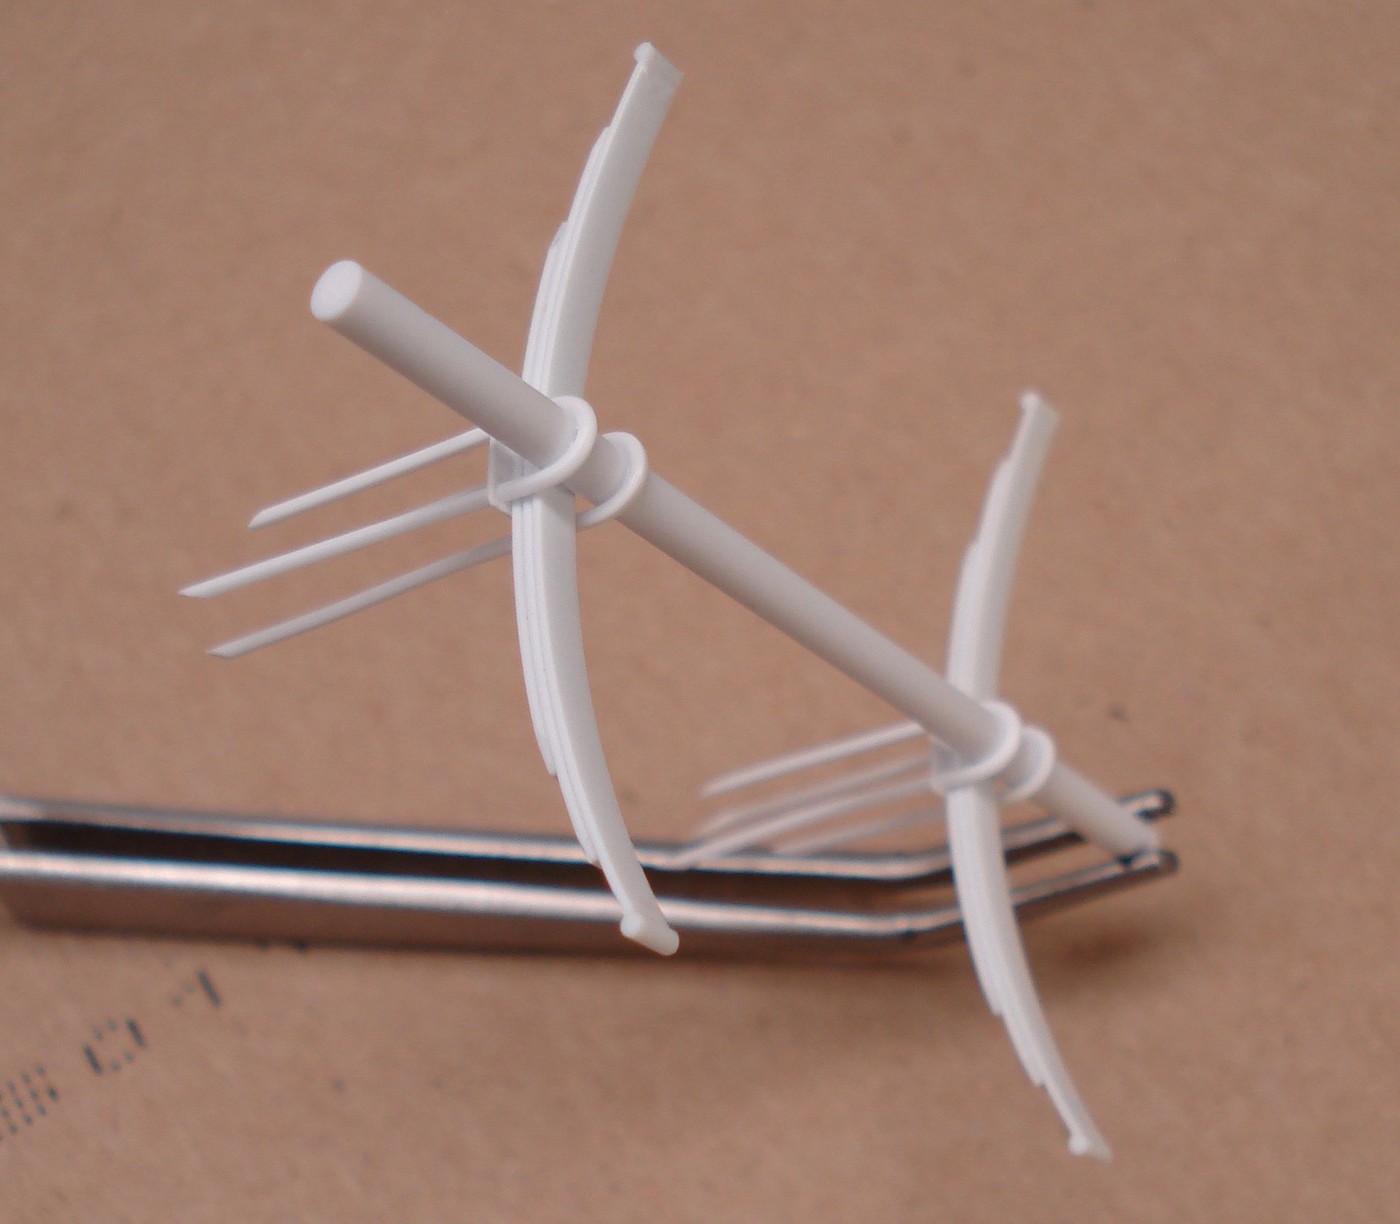 Then the U bolts trimmed and sanded using a shield to make the protruding Hex heads even. 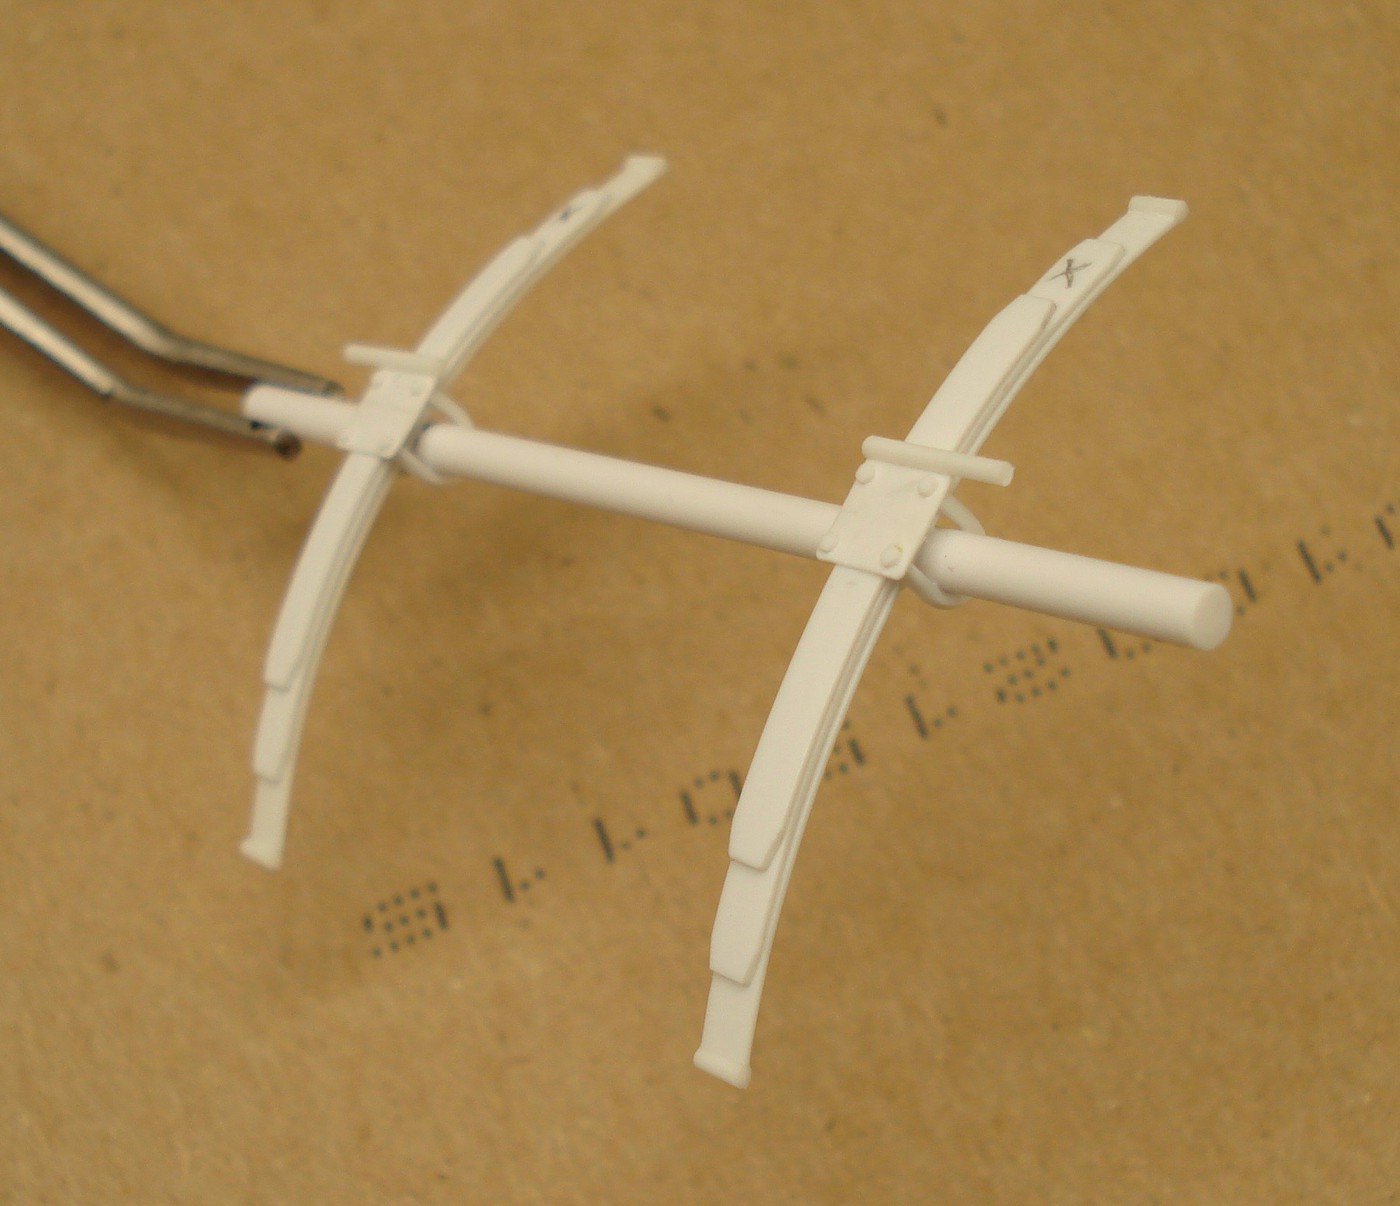 The result on the Mustang. Still have to make some shackles, disk brakes, and find order correct front wheels. 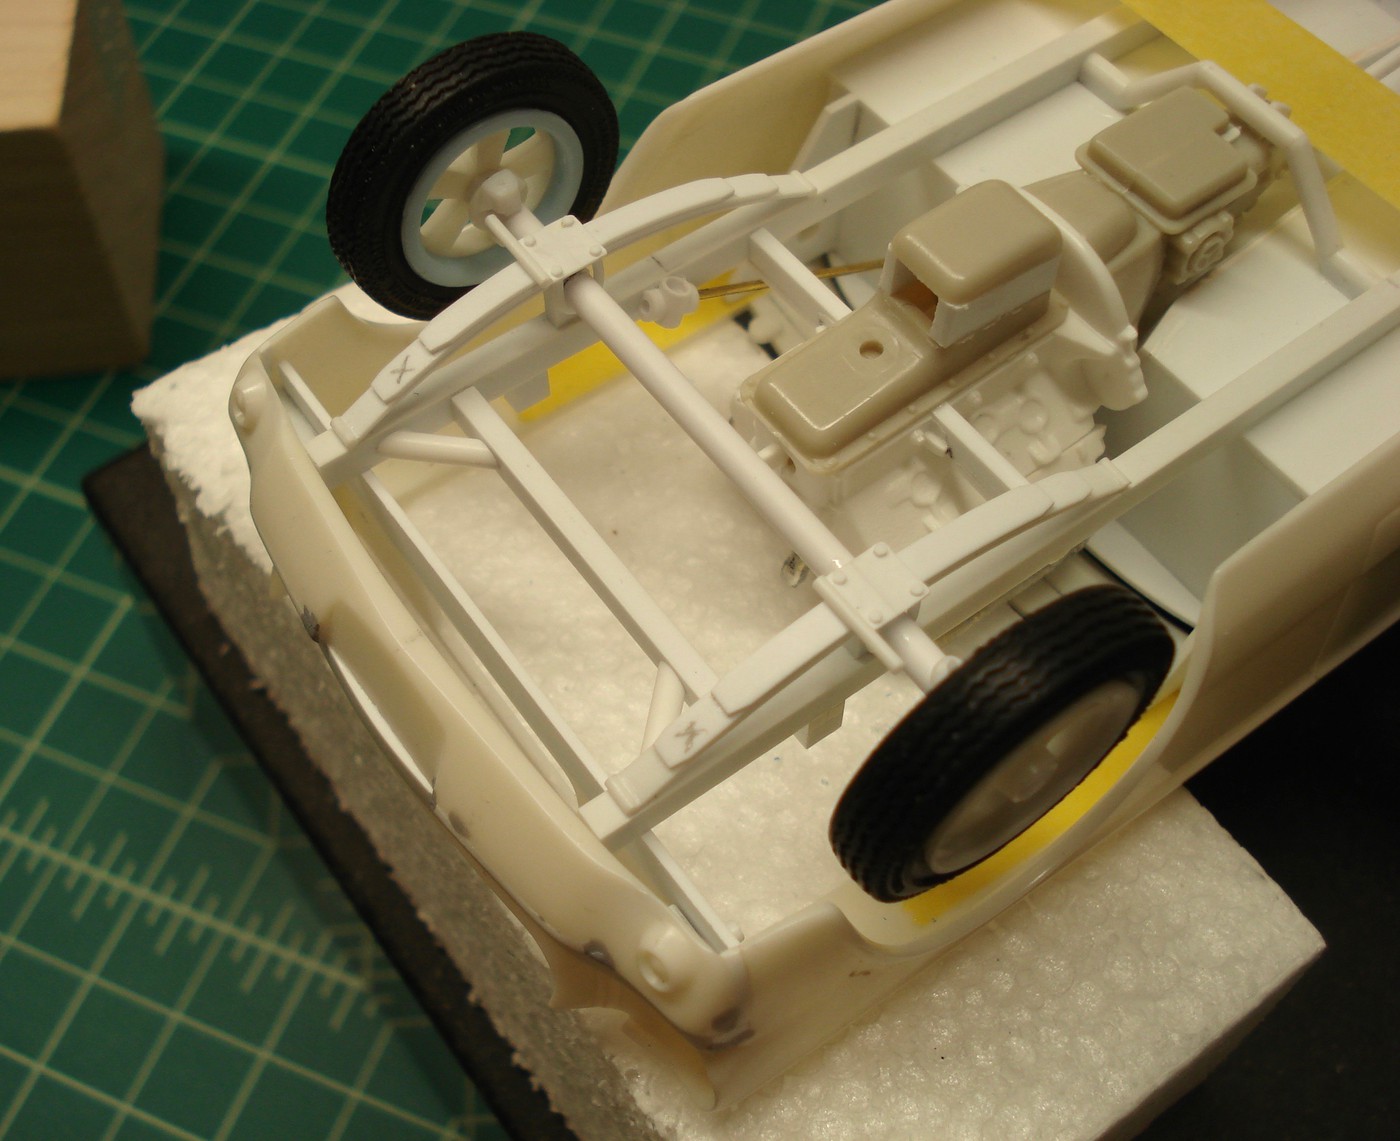 |
|
|
|
Post by tubbs on Oct 26, 2018 5:45:07 GMT -6
looks really good. I will attempt... this for my nova gasser. really like what you did here. like the deep sump pan too, that's how I do mine.
|
|
|
|
Post by styrenesurfer on Oct 26, 2018 13:30:38 GMT -6
looks really good. I will attempt... this for my nova gasser. really like what you did here. like the deep sump pan too, that's how I do mine. Thanx Tubbs, The deep pan is just tacked together for now (I'm using the few photographs that were taken of the car for reference so I mock it up and try to look at the model from the same perspective as the pictures until I'm satisfied with it) Kind of laborious  One thing I would do differently in hindsight, use smaller stock for the U-Bolts. When I bought the material I thought .03 was the smallest size available. Use .02 rod and it would look more correct.  |
|
|
|
Post by tubbs on Oct 26, 2018 13:45:24 GMT -6
I have a hole narrative on this one. cant give cretit though, don't remember who did this one.  what are you going to do for spindles? I guess that's what youd call it. I am going to use square tubing cut in half. you will never guess what this guy used... OK, i'll show you...   he cuts a piece off squares it up and vuala… I like that idea, but I love the way your looks. thanks for the tip on the smaller rod too. I may end up using small wire. |
|
|
|
Post by 1320wayne on Nov 1, 2018 21:10:25 GMT -6
That is some impressive work. Keep it going.
|
|
|
|
Post by styrenesurfer on Nov 27, 2018 18:17:05 GMT -6
More progress, made a new improved steering gear box, made locating (keyways) in the frame rails and corresponding tabs on the leaf springs so I could remove the temporary front axle locators. Made front spring mounts and rear spring shackles. 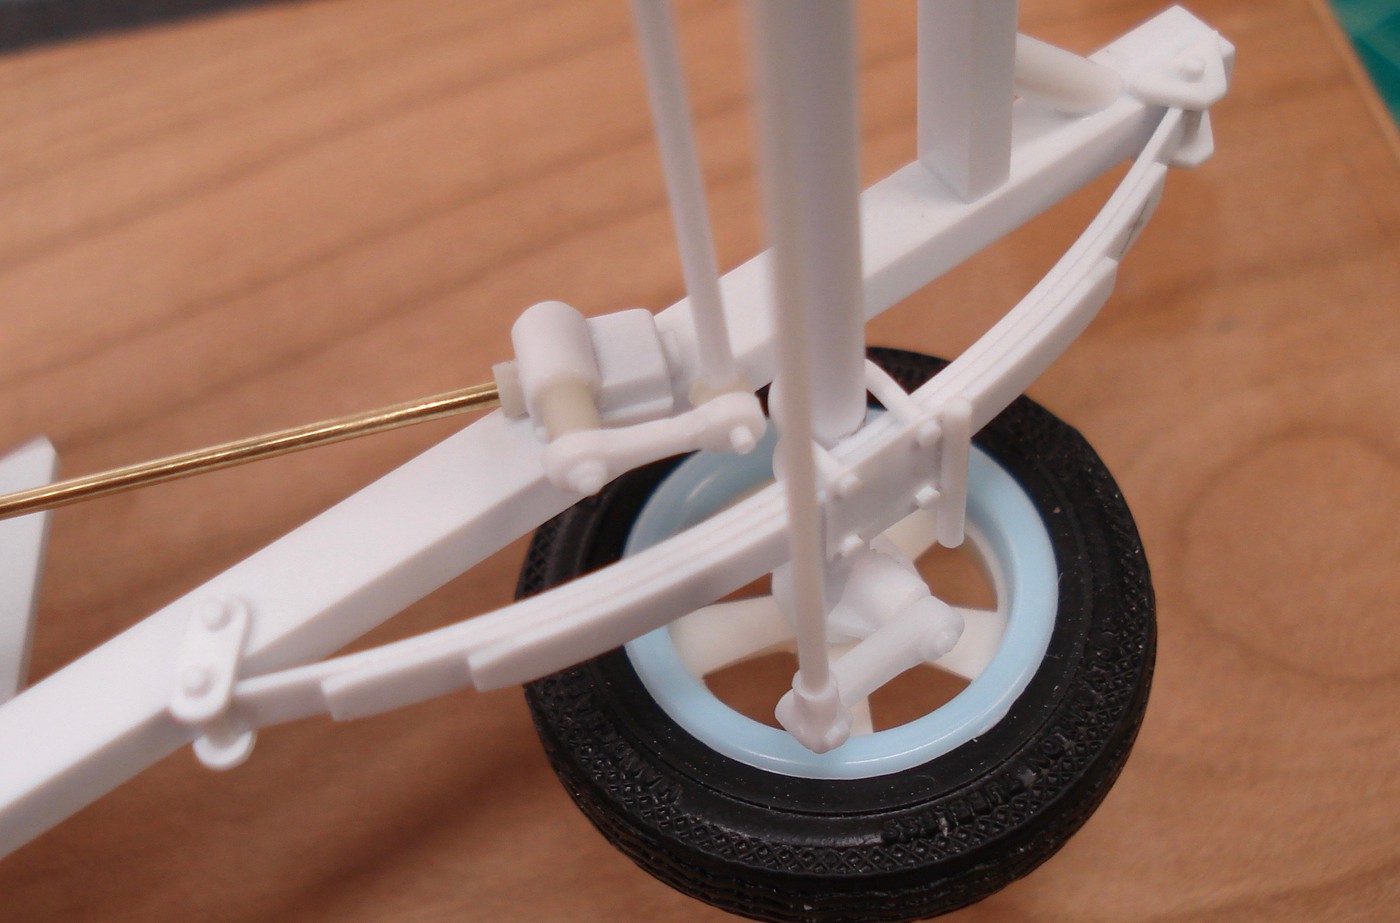 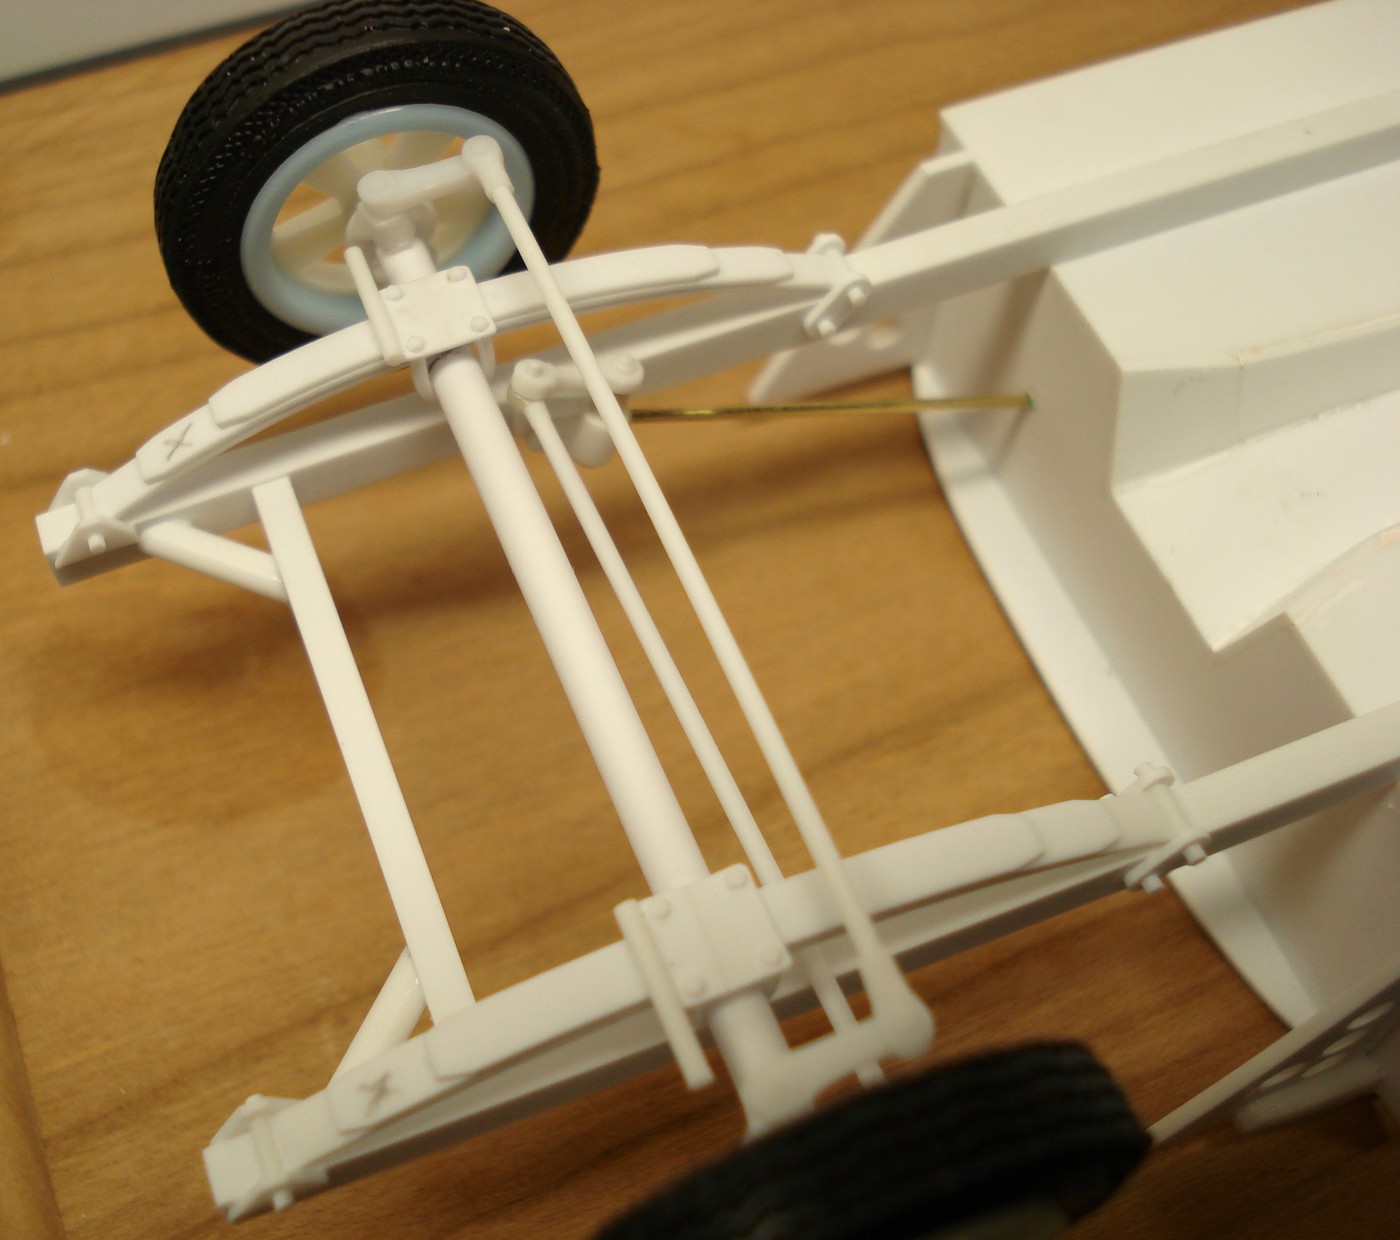 in this last pic you can hopefully see the TABs added to the spring ends and "keyways" in the frame rails. This is to locate the front axle and keep the front end from sagging. 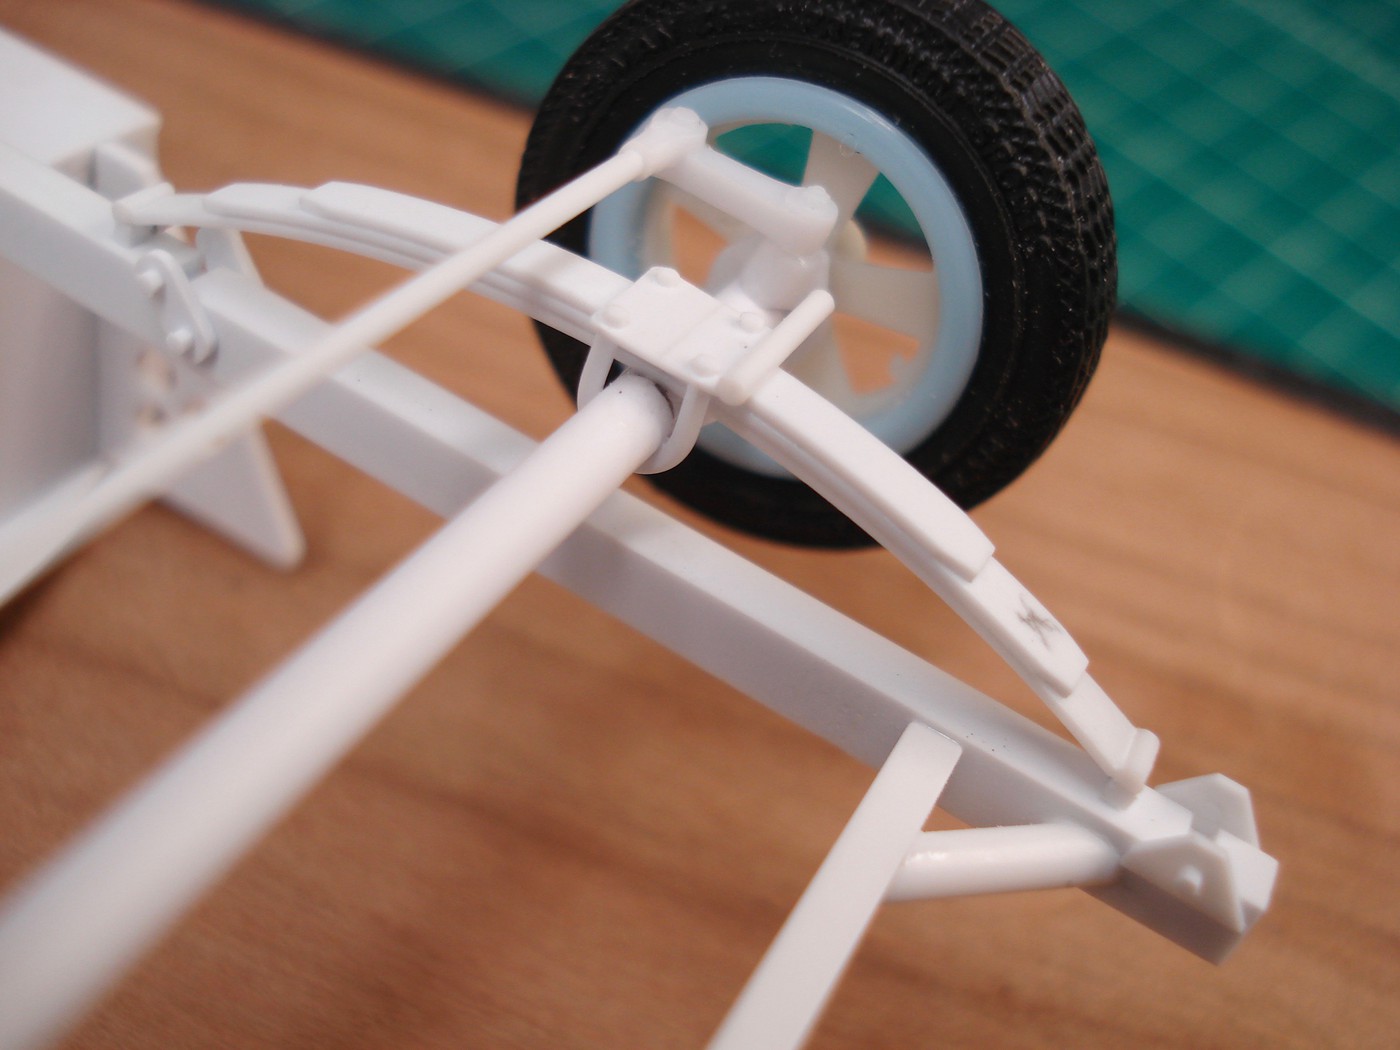 Oh here is tools made to create the grooves(two saw blades glued together, then honed down to correct thickness. Fixtures to make shackles and front spring mounts. 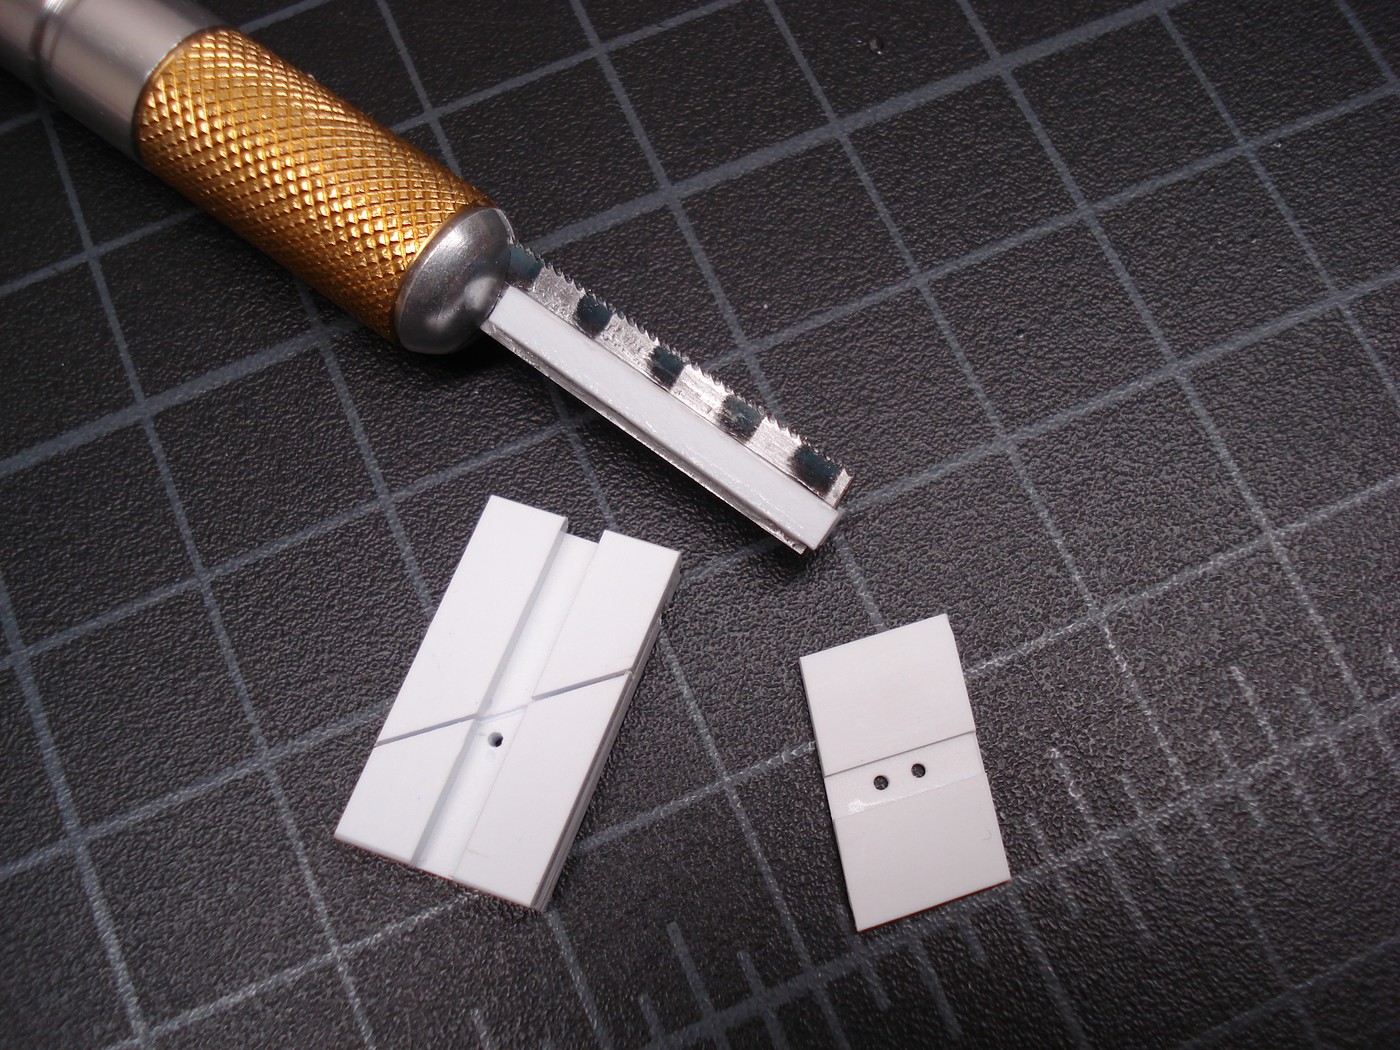 |
|
|
|
Post by tubbs on Dec 7, 2018 14:32:34 GMT -6
man, looking real good. it looks like actual car parts instead of piles of white styrene like my stuff. you must have a pretty good stash of styrene?
|
|
dogfish7
Junior Dragster Champion

Posts: 400
|
Post by dogfish7 on Dec 12, 2018 17:37:17 GMT -6
Awesome!
|
|
|
|
Post by styrenesurfer on Dec 13, 2018 19:12:40 GMT -6
Thanx, Did some work on the engine mount. Had to figure out how to make something small to look in scale yet strong enough for the job. I sandwiched Evergreen styrene .060 Channel W/ .036 Carbon rod. 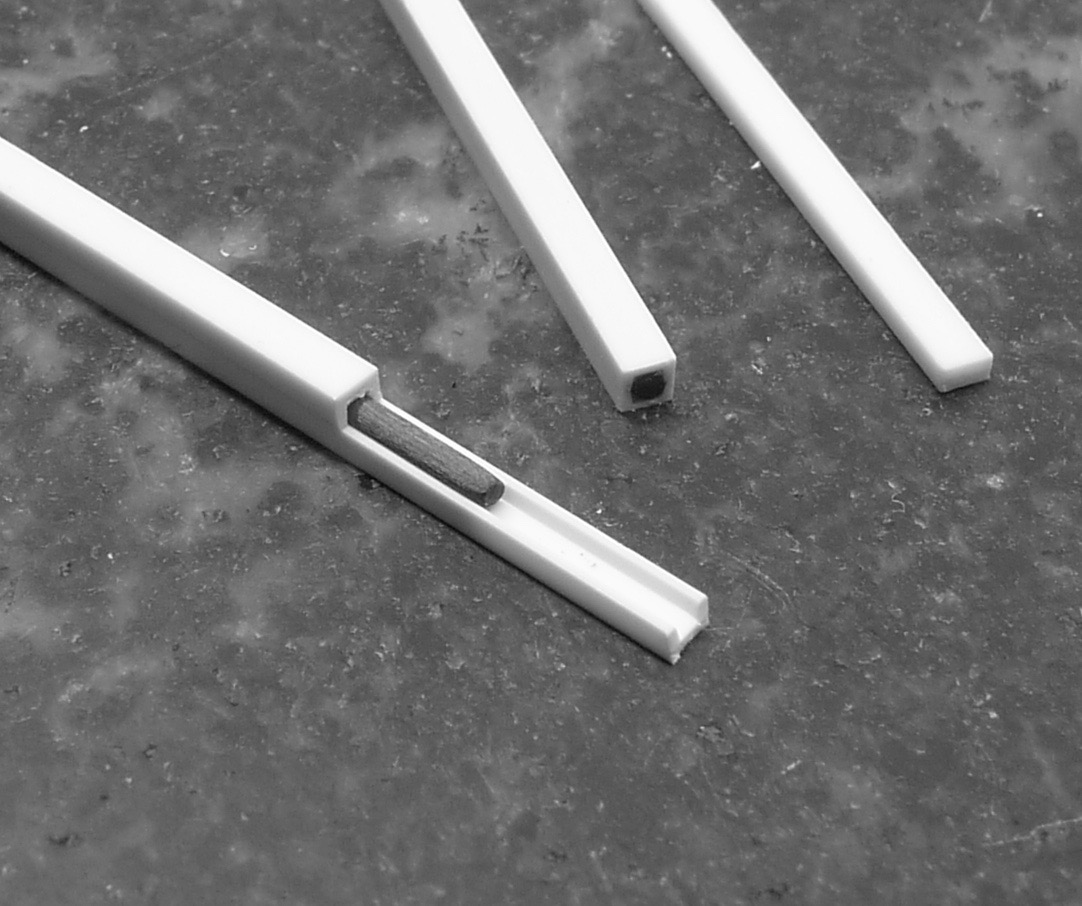 Then added more .010 to the sides, .080x.030 on top. so something close to a scale 2.5"x2" . then made some small pieces for the actual attachment points to the motor. 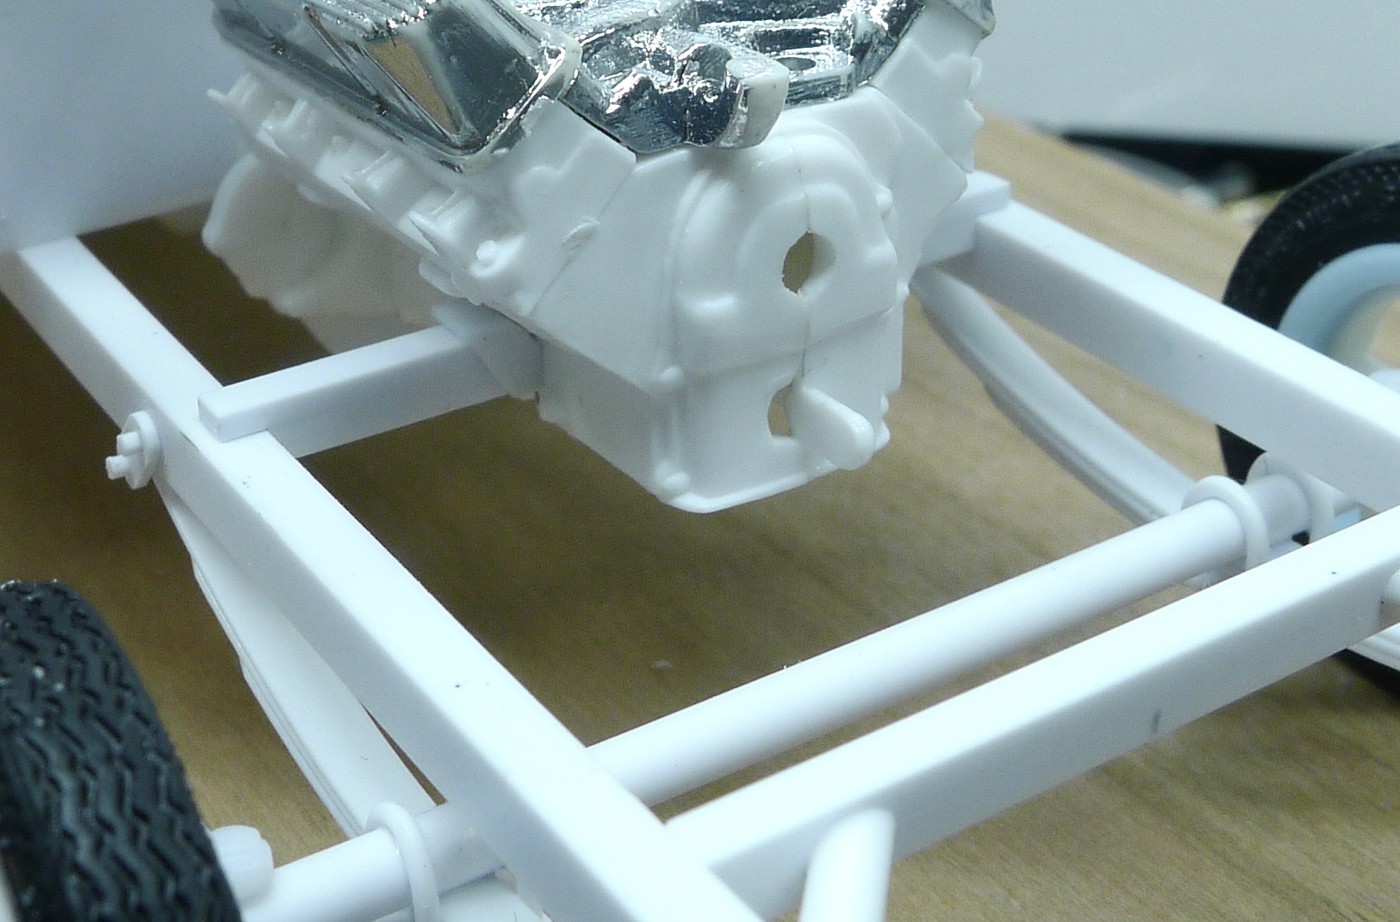 Still some refining to do here. Back at the other end of the car I did a little work cleaning up the ladder bars and raised the rear about .030 of an inch. Cut some rear coil springs from a Revell SSR kit to the correct length and got very lucky, because all the tires touch the ground. This end of the car strays from being accurate, just getting the rear axle located rite and the tires within the wheel opining looking OK was real pain 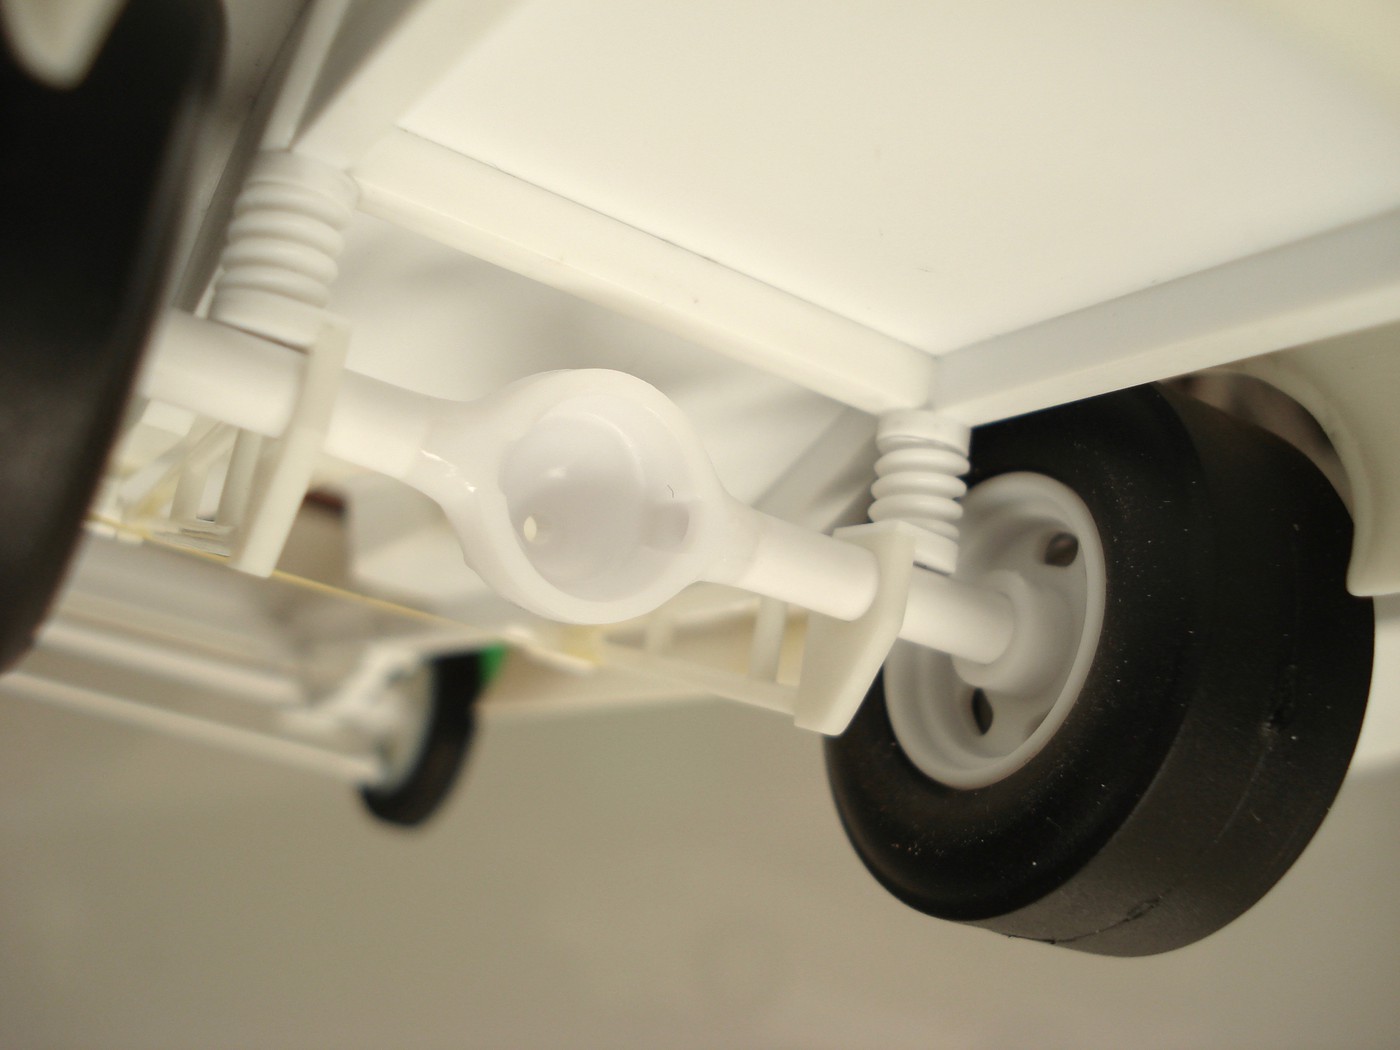 |
|
|
|
Post by tubbs on Dec 14, 2018 7:57:57 GMT -6
very cool!! super work.
|
|
|
|
Post by mustang1989 on Jan 3, 2019 14:32:51 GMT -6
This is insanely cool!! It's almost like you're building a real car!
|
|
|
|
Post by tubbs on Jan 23, 2019 14:49:54 GMT -6
any more progress on this one?
|
|
|
|
Post by styrenesurfer on Dec 6, 2019 14:08:43 GMT -6
Geez, I guess it been a while hasn't it. worked on refining suspension details... 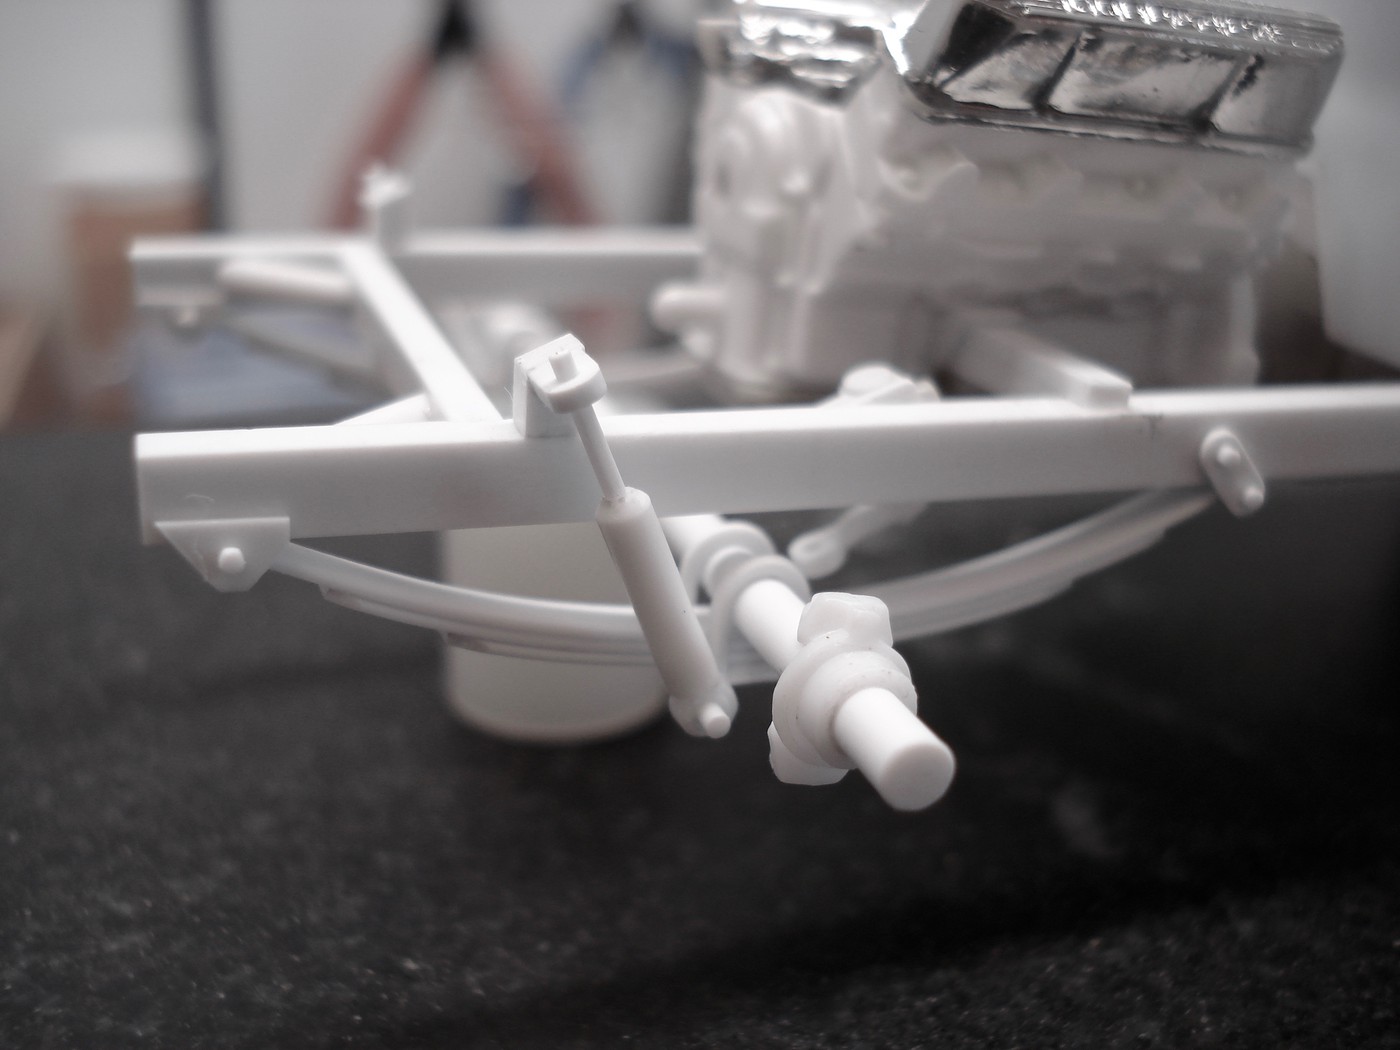 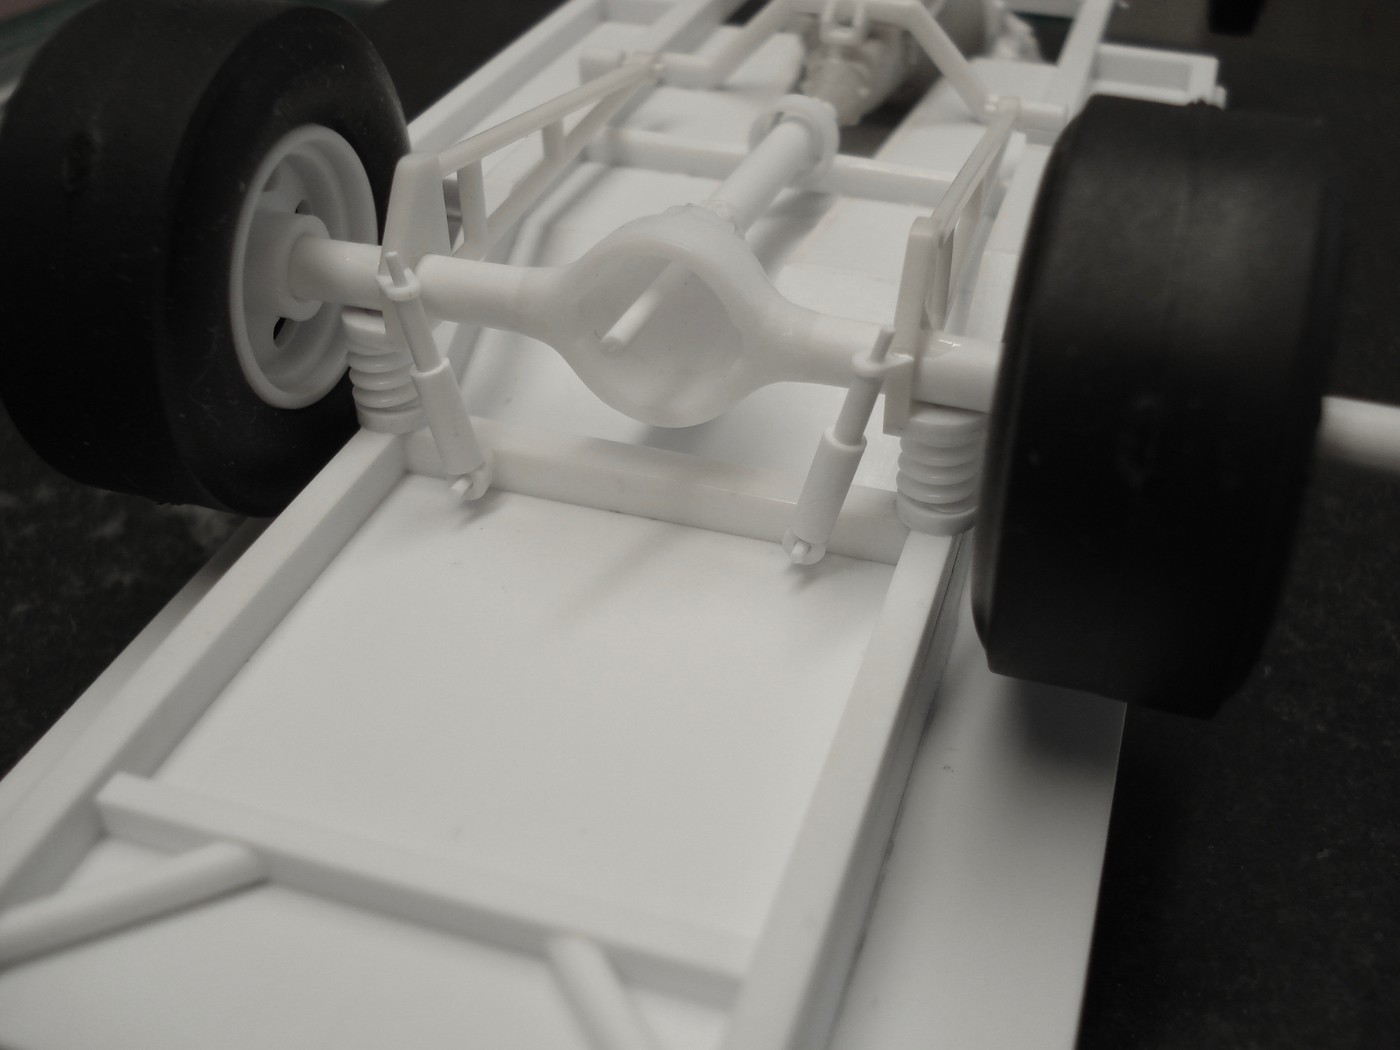 Also decided to put a supercharger in it rather than trying to create the Algon injection manifold (believe me I tried to,but will leave that one for the 3D experts. The 427 FE block is actually 1/24Th scale from the Sheby Cobra kit. It is a low rise single carb so had to remove a lot and then build it back up. This is a M/T style. Some pics of the process.   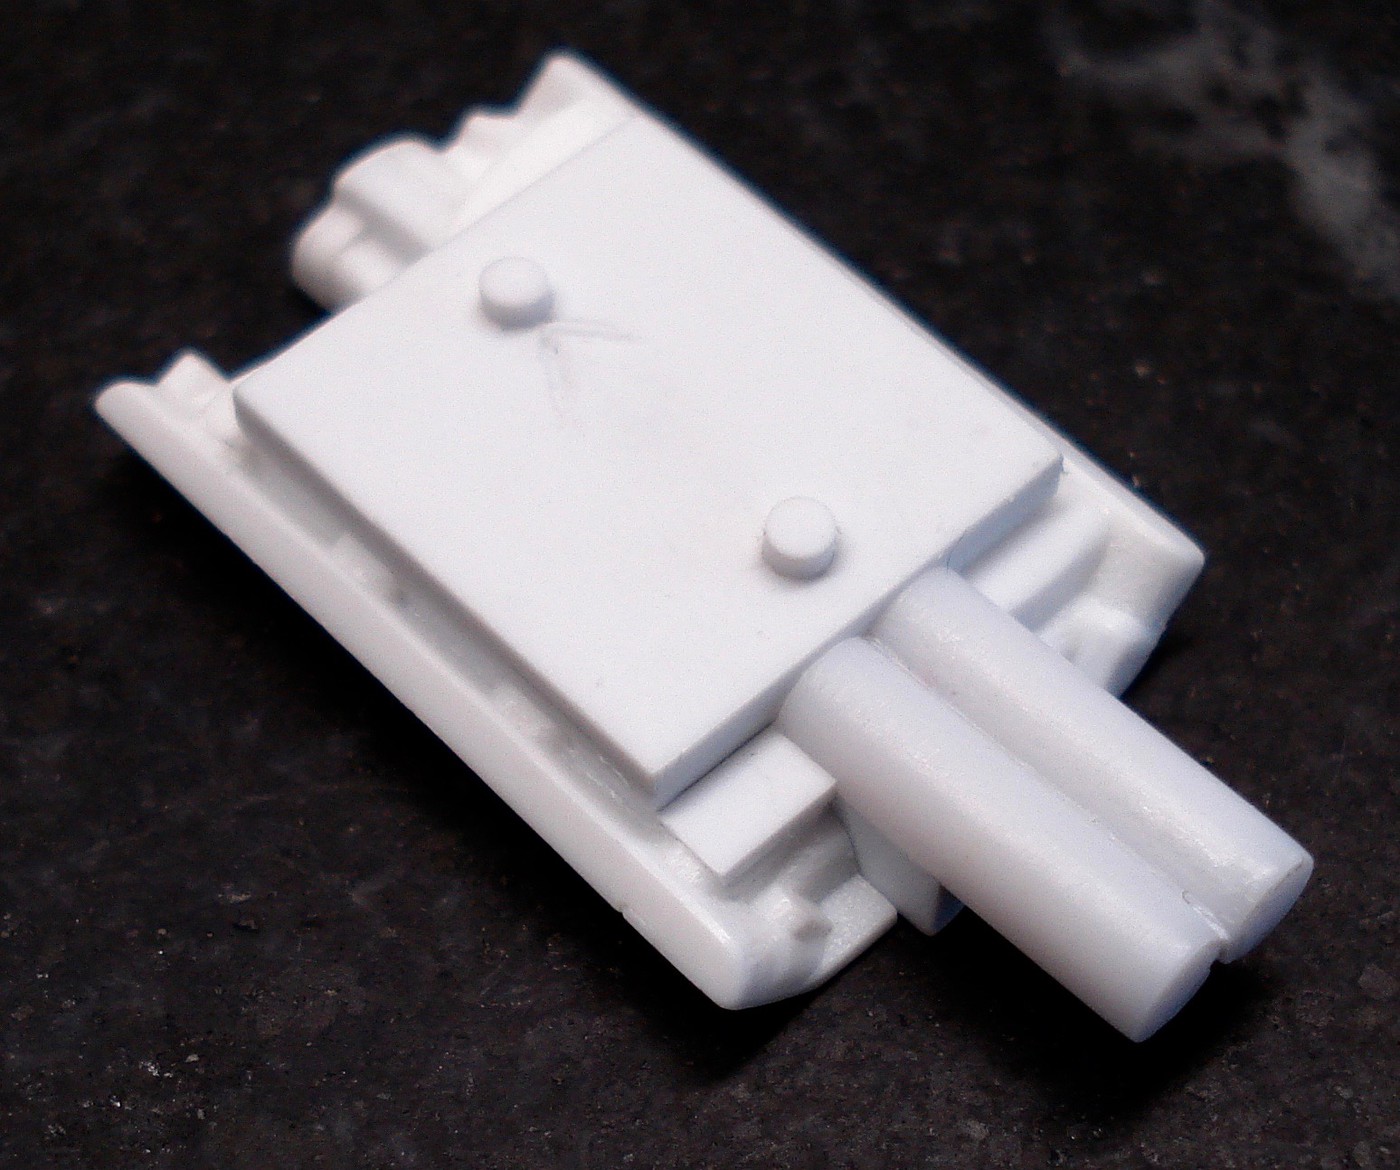 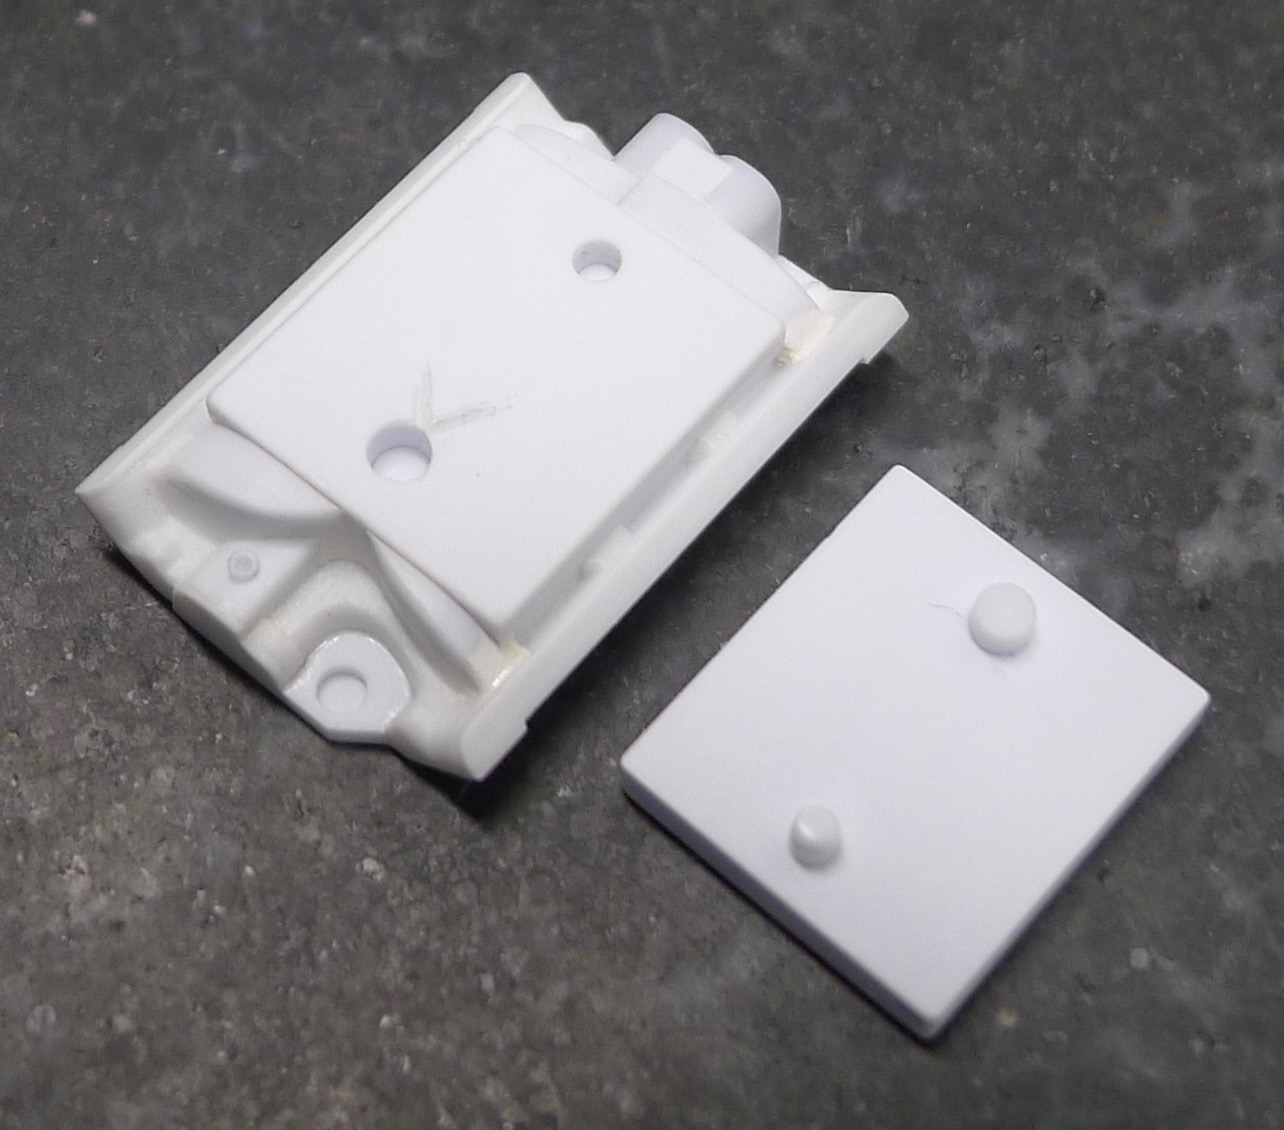 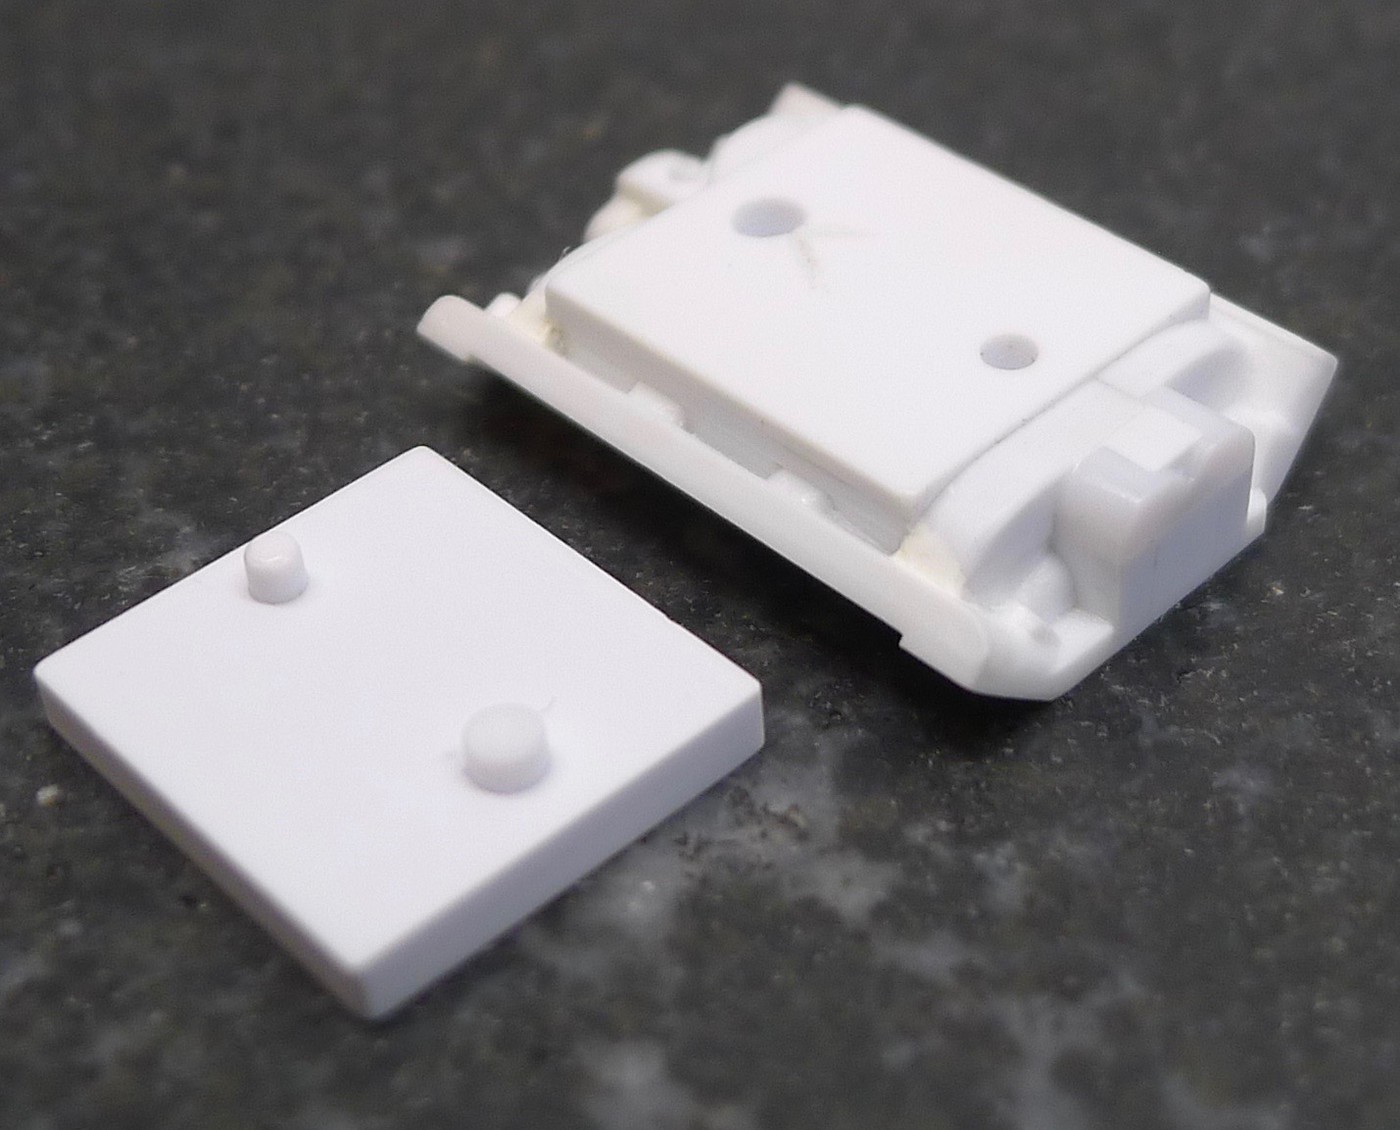 I'm in contact with a caster so hopefully the may be available for others. |
|
|
|
Post by styrenesurfer on Dec 6, 2019 14:40:17 GMT -6
Here is an example of an old vintage M/T Ford 427 FE supercharger manifold 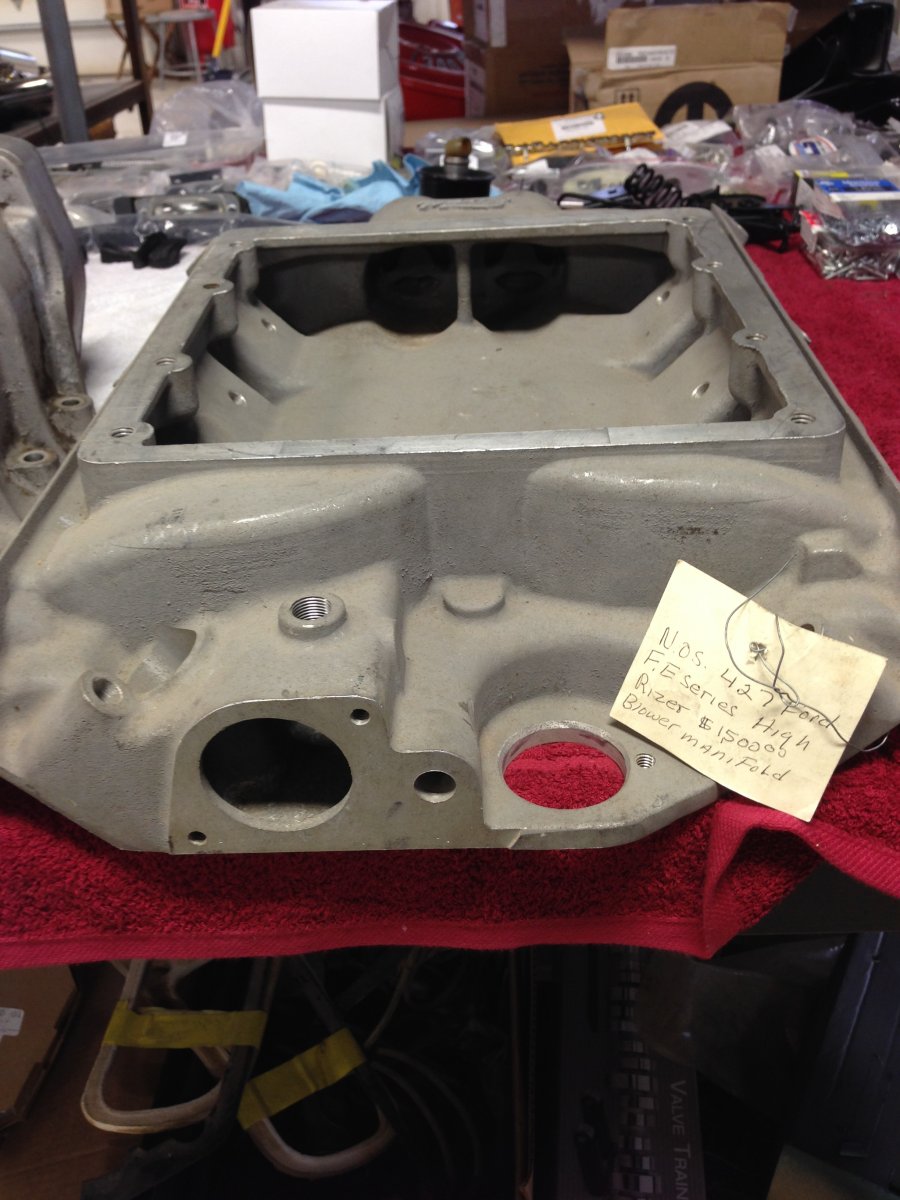 Was kind of rare to see them in drag racing but they were out there. 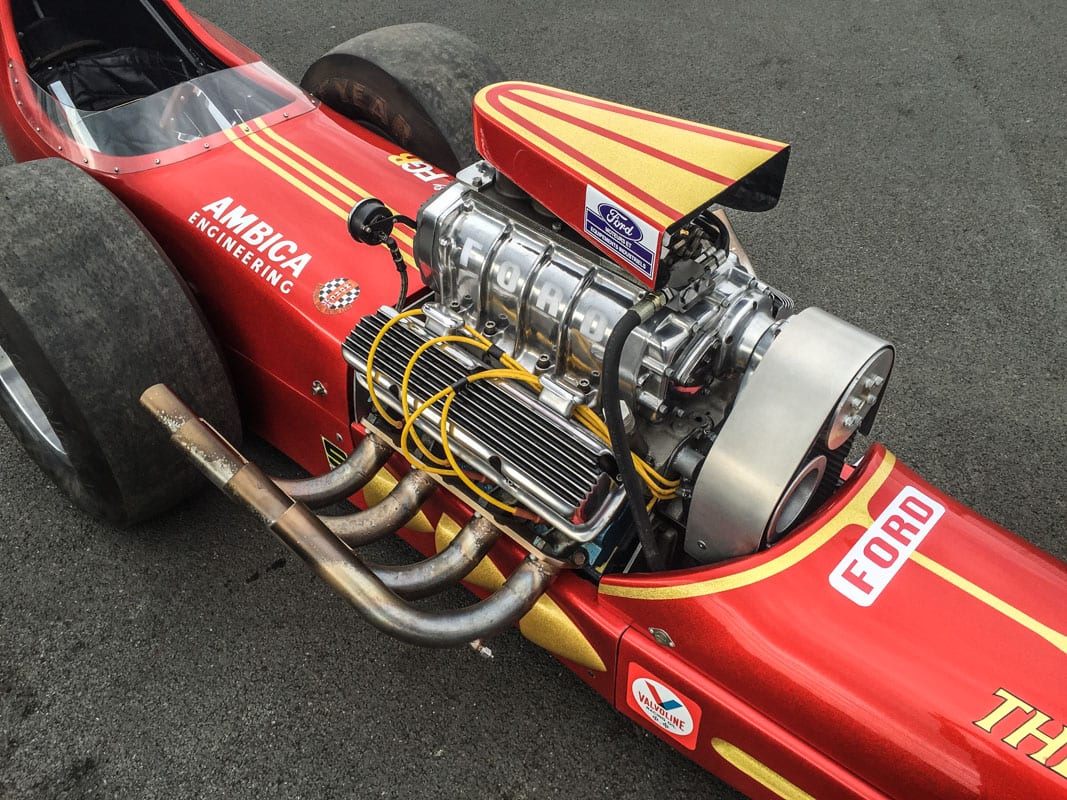 some shock absorber build details. 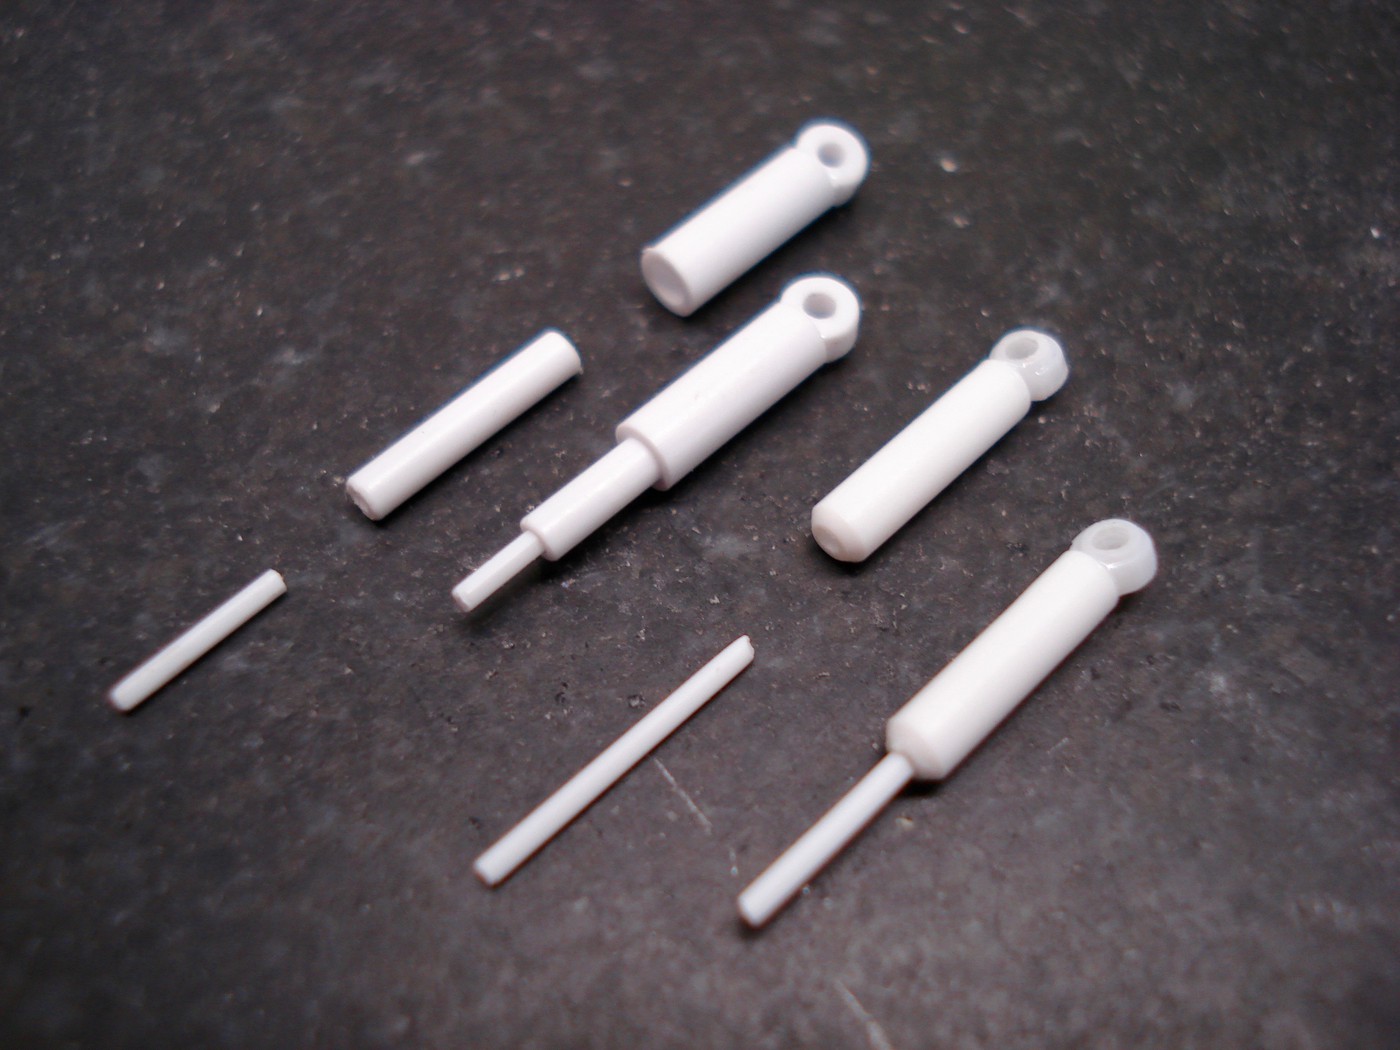 And roll cage. 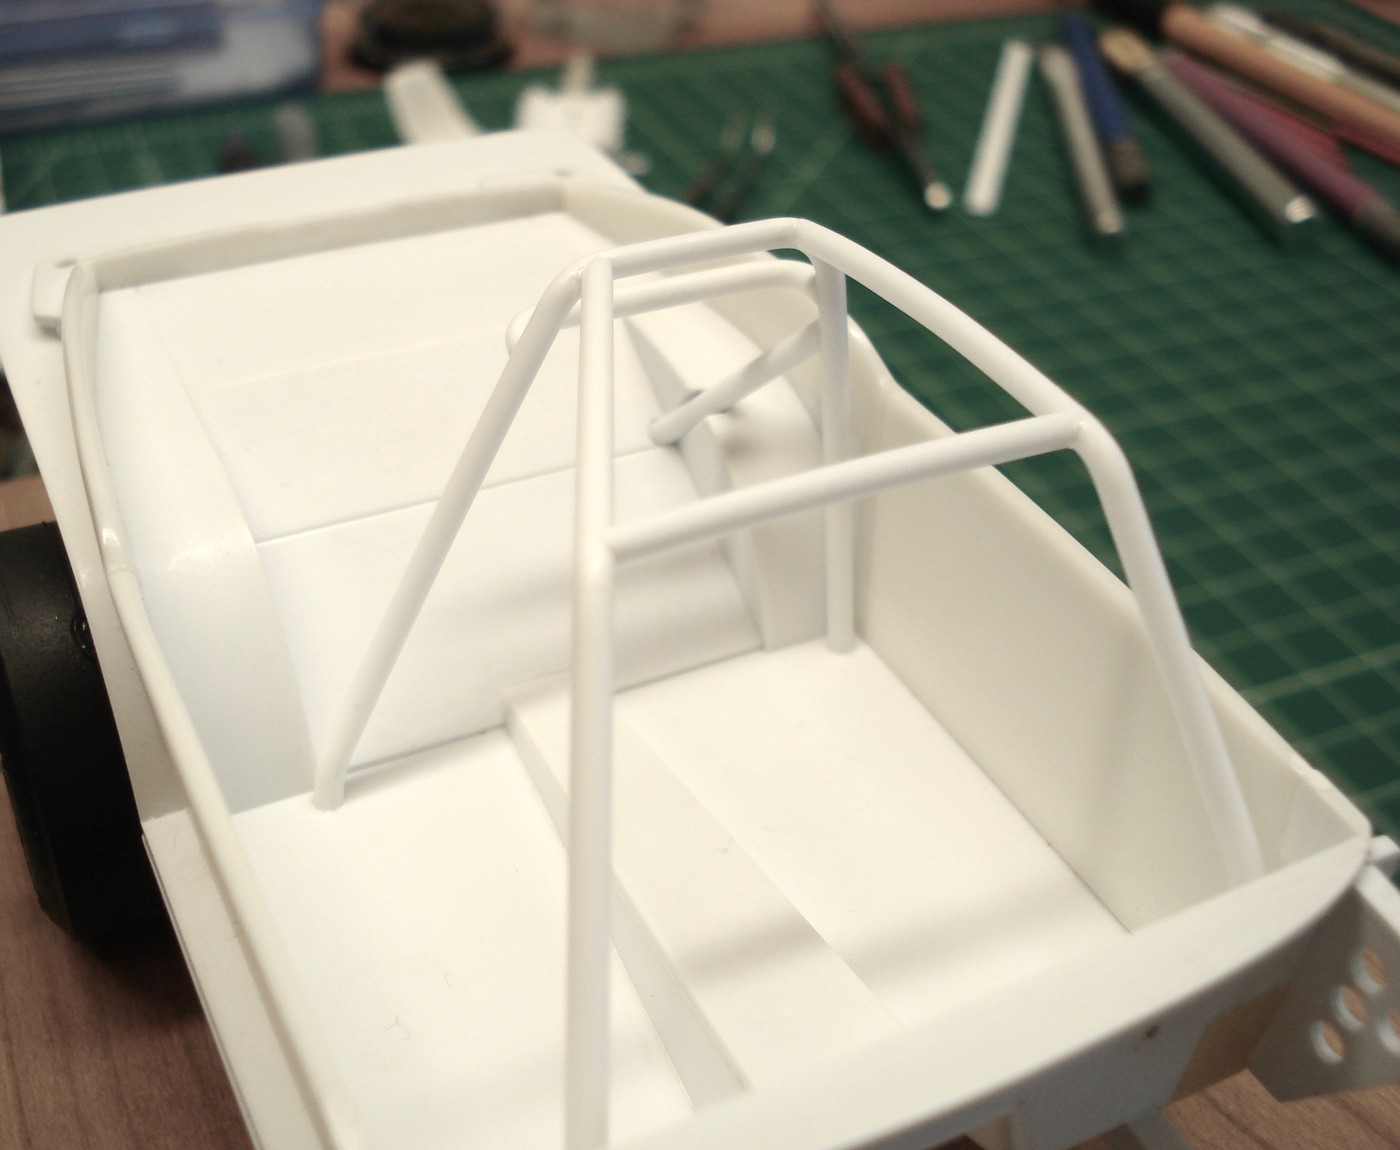 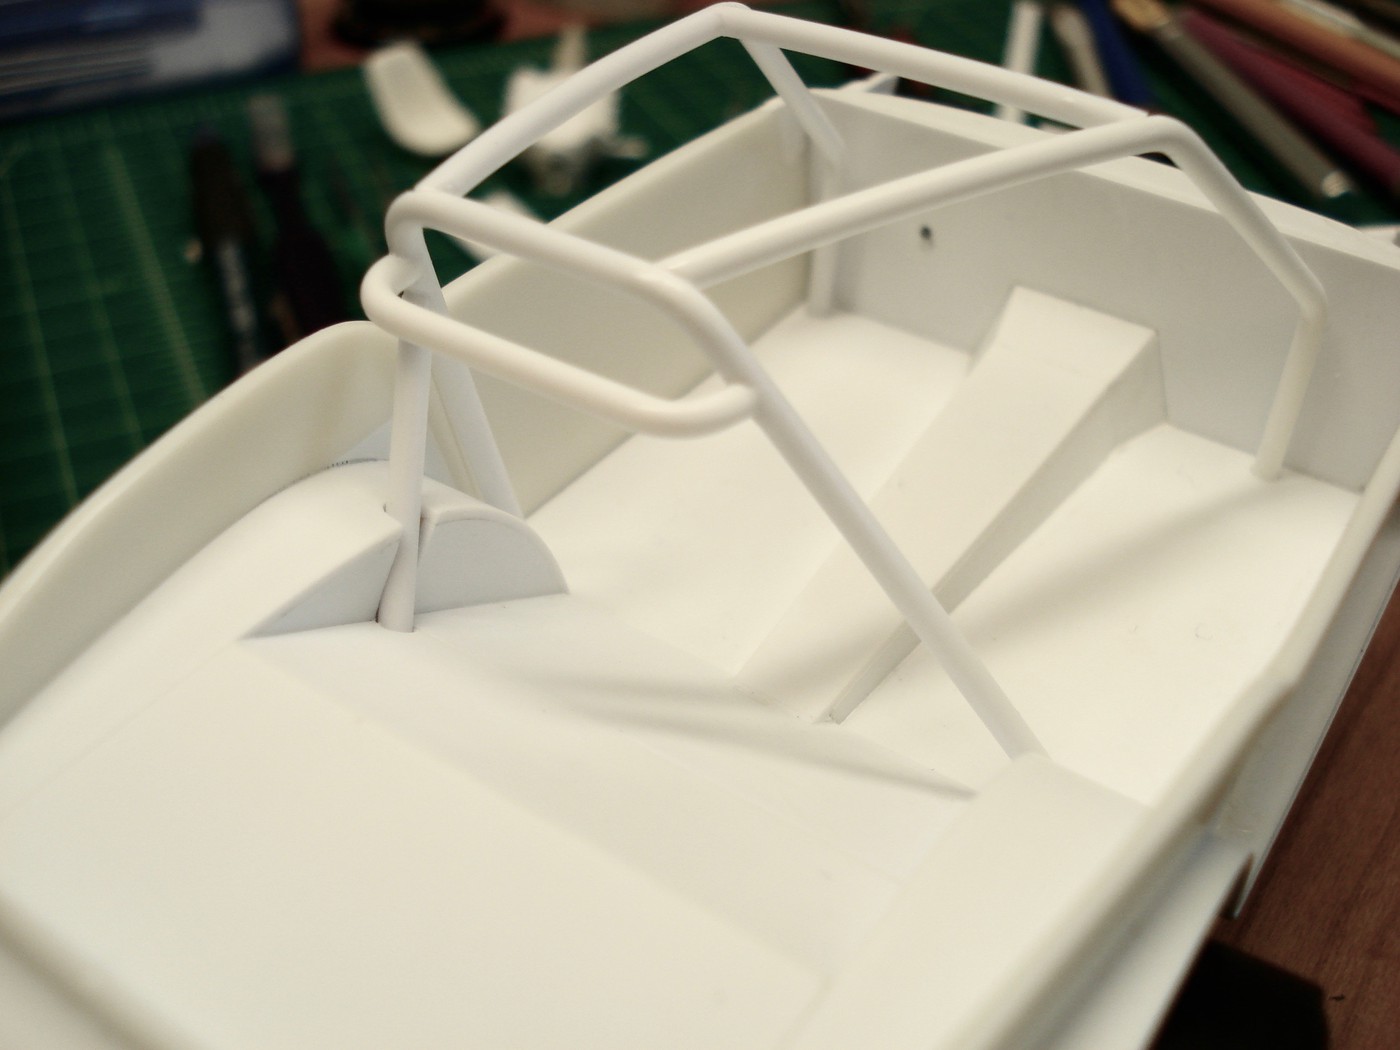 |
|


